365 Days Handmade

Making life a better place, one day at a time


1 Comment

Day 170/365: The Day The Ladybugs Arrived

ladybugs

Last year on September 1st, one of my neighbors was offering a young angel’s trumpet plant free to anyone who wanted it.  This neighbor had recently learned that the angel’s trumpet (aka brugmansia) was poisonous.  She had a couple of dogs that she let run around in her backyard, and she didn’t want to take any chances of accidental dog poisoning.

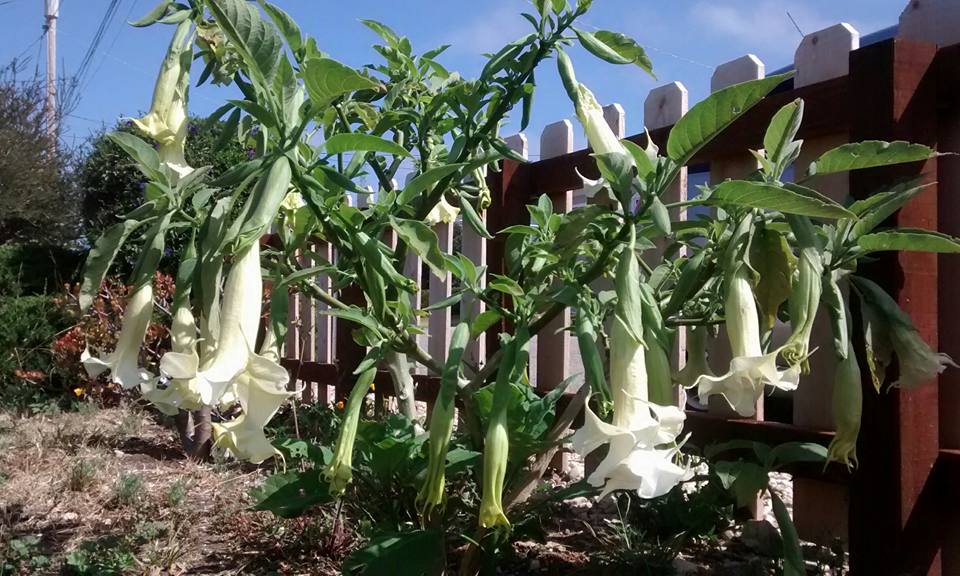
Having no children, pets, or any kind of nice flowering plant in my front yard, I quickly volunteered to take the free brugmansia.  Sean and I went over to her house with a bucket, and her husband dug up the little plant.  It was only about three feet tall and pretty much just a forked, leafy stick at the time, but we took it home in our bucket and planted it in the front yard.  Coincidentally, that day was also my birthday, so it was a neat little way to mark a new year in my life.

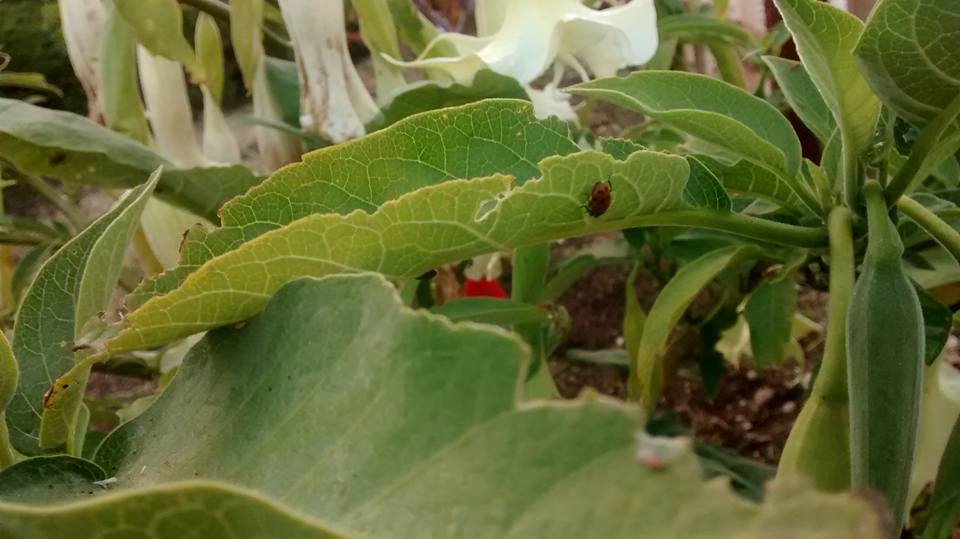
I don’t typically have a green thumb, but with a little bit of luck and some internet research, I was able to nurture that forked leafy stick into an actual thriving plant.  After a few months, the trumpet flowers started to bloom.

6.19.2015A

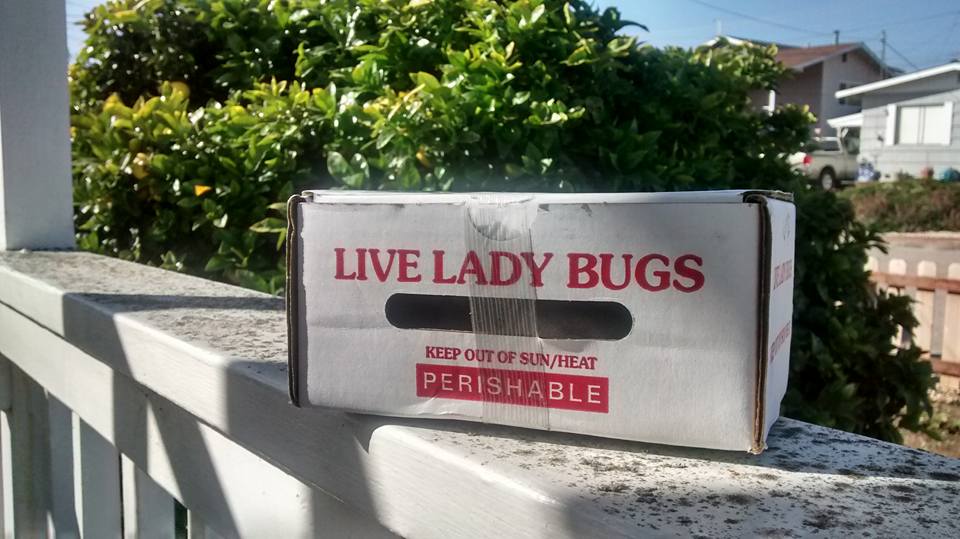
The bummer, though, was that beetles were eating the leaves.  I wanted to wipe out those little critters, but I also didn’t want to douse my plant with pesticide.  I looked into organic alternatives and decided to order some ladybugs online.  The smallest available quantity was an order of 1,500 ladybugs.

They were supposed to arrive via UPS two-day air, so I told Sean (who is currently on summer vacation) to stick around the house and wait for the UPS guy since I had to be at work all day.  At around 11:30 AM, I was in my office when the phone rang.  It was Sean.

“Just wanted to let you know your ladybugs arrived,” he said.

“All right!” I said.  “Did you open the box to see if they’re still alive?”

“Yeah,” he said.  “But how do I get them all back in the box?”

I was speechless.  In that moment, I could just see 1,500 ladybugs flitting around the cathedral ceiling of my beautiful Morro Bay house, while I sat helplessly at my desk inside the prison.

I said, “Are you serious?”

“Nah,” Sean said and laughed.  “I’m kidding.”

“Ha ha,” I said.  “There better not be any ladybugs flying around inside my house right now.”

“Don’t worry,” he said.  “We’ll let them loose when you get home.”

So that’s what we did, but not all 1,500.  I’m going to ration them out a little at a time over the next few days.

6.19.2015C

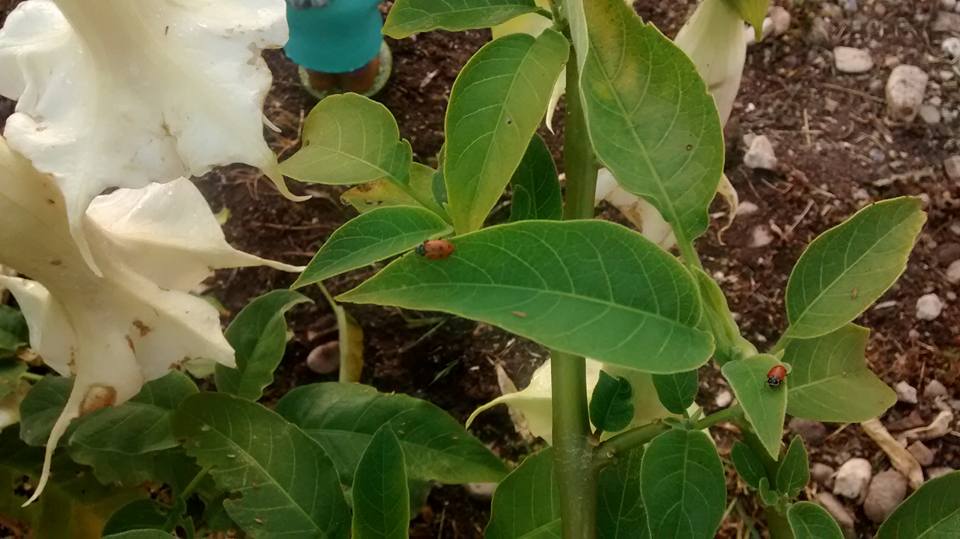
And even if they don’t get all the beetles, they’re still very pretty to look at.

6.19.2015D

Advertisement


Leave a comment

Day 169/365: A Little Bit More Sock Progress

Yesterday at work, I kept feeling like it was a Thursday and then realizing that it was only Wednesday.  Today felt like it should be Friday, but then I would remember it was only Thursday and that I still had one more day of work to go.  Such a disappointing feeling.  Have you ever had that kind of a week?

I knit a few more rows on the sock.  The sock itself made for a boring photo, so I threw in one of my little unazukin toys for an added bit of kawaii.

6.18.2015


Leave a comment

Day 167/365: New Sock

I went back to work today.  It’s always tough getting through a 10-hour-day after returning from a nice long break.  Now that I’m home, I could just eat dinner and go to bed, but I started my half marathon training plan last week and still need to go run for thirty minutes.

In other news, I started a new sock.

6.16.2015


2 Comments

Day 166/365: The Day We Planted Pumpkin Seedlings

My mom’s stay in Morro Bay is over.  She’s now in Houston, visiting my brother and having all kinds of adventures there.

After Sean and I said goodbye to her at the airport, I was feeling a little sad.  We went out for lunch in San Luis Obispo and then drove back to Morro Bay.  On our way home, we stopped at Grandma’s Frozen Yogurt for a bit of a treat.  They have a nice outdoor patio where you can enjoy your frozen yogurt and do some people watching.  That’s where I spotted the small pots of pumpkin seedlings in the corner.  The sign indicated that they were free to anybody who wanted some.  According to the sign, if you planted the seedlings now, the pumpkins would be fully grown by Halloween.  Naturally I helped myself to one of the free pots.

“Take as many as you want,” the woman who rang up our yogurt urged.

So I took three more.

Sean had to stop at Miner’s Ace Hardware to purchase a few items, so I tagged along and browsed through the gardening section.  That’s where I saw The Gnomes.  I wanted to buy all of them, but they were kind of pricey, so I only allowed myself to pick two.  I figured I could always go back and get the others after payday.  When Sean and I got up to the cash register, I set them down on the conveyor belt and the cashier looked at them fondly as if they were old friends.  She even patted one on the shoulder.

“Hey, guys,” she said.  “Looks like you’re off to a new home.”

She rang up our purchases and didn’t say a word to me about the gnomes, although she was completely friendly and nice.  Just an average, every day, unremarkable hardware store buying and selling experience.

At the end of the transaction, she handed me the receipt and smiled and turned back to the gnomes.  “Okay, guys,” she said, giving a final affectionate pat. “You be good, now.  Bye.”

I couldn’t help feeling immensely cheered after that.

6.15.2015A

Two little pumpkin seedlings and the garden gnomes in the late afternoon sunlight.

6.15.2015B

Close-up of Gnome #2. No woman could resist his charm.


2 Comments

Day 165/365: The 28-Year-Old Block Project, Quilted and Completed!

Remember last week, when my mom was visiting from Hawaii, and I started piecing together the appliqued blocks that she began hand-sewing back in 1987?

Twenty-eight years later, it’s finished!

6.14.2015C

If you missed the earlier posts about this quilt, here’s what we started with:

6.8.2015A

My mom began this project back in 1987.  She cut those blue squares with scissors instead of a rotary blade.  (I don’t even know if rotary blades and self-healing cutting mats were available back in 1987.)  Then, sewing by hand, she appliqued those little sun-hat-wearing figures to the blue background, using embroidery thread and the blanket stitch.  Her original plan was to hand-sew each of the blocks together to make one large sheet to cover a bed.

I’m not sure exactly when she stopped working on this project, but she didn’t get around to seriously picking it up again until just last year.  About three months ago, she sent a photo of the blocks to me with a text message:  “Look at what I’m working on.”  She had completed a huge pile of them.

I texted back and offered to sew the blocks together on my sewing machine.  She was planning on coming out to California in June for my nephew’s high school graduation, so I figured I’d do it while she was in town for her visit.  Fast forward to last week, when she arrived in Morro Bay with her luggage and goods from Hawaii.

6.8.2015B

When I saw the actual blocks, I realized that they’d look a lot better against a contrasting fabric, rather than sewn side by side.  So I purchased some yellow cotton and went to work.

Here is a recap of the steps:

6.9.2015A

Cutting fabric with rulers, a rotary blade, and a self-healing mat. No using scissors here!

6.9.2015B

This cute little guy needs a yellow frame to really stand out.

6.10.2015A

Each one getting his own frame.

6.10.2015B

Filling in the squares.

6.10.2015C

Sewing strips, and then sewing the strips together.

6.10.2015D

The finished quilt top!

I didn’t take any photos of layering the backing/batting/quilt-top sandwich or any photos of the actual quilting, but here’s what it looked like toward the end:

6.11.2015A

So close to being done!

And there you have it…

6.14.2015A

Ta-da! The finished quilt in all its glory.

A labor of love for my Mama.

6.14.2015B


1 Comment

Day 162/365: Quilting The 28-Year-Old Blocks

6.10.2015D

To refresh your memory: the finished quilt top.

For the backing of my current quilt project, all I had to do was go to the fabric stash.  I found three yards of a green cotton with a pretty repeating floral motif.  I had to do some measuring, cutting, and sewing to make the backing wide enough for the quilt top.  Then I taped the completed sheet of fabric backing to the carpet and proceeded with spraying quilt basting spray and sandwiching the layers of quilt backing, the batting, and the quilt top.

For the binding, I purchased half a yard of an orange cotton print from my local independent fabric shop.  After slicing the orange fabric into strips, I went through the process of folding, pressing, and sewing them together to make one long strip of binding.

Next I machine-quilted the fabric and batting sandwich.  I didn’t do anything fancy– just sewed straight lines.  The last thing I did before calling it a day was sew the binding to all four edges, leaving a gap where the two ends will have to be connected.

6.11.2015A

Ahhh… almost done.


2 Comments

Day 161/365: Quilt Top of 28-Year-Old Blocks, Done!

As you know from my last few posts, my mom has been visiting from out of town, and I’ve been putting together for her a project that she started back in 1987.

I bought a yard and a half of the yellow cotton.  I was able to cut enough rectangular strips, but then I didn’t have quite enough for the squares.  The bummer is that I would have had exactly enough fabric if only I’d been a lot more careful with my measuring before slicing away with the rotary cutter.

6.10.2015A

Arranging the placement of blocks on the sunroom floor.

Luckily, I had remnants from another yellow cotton print and was able to use that fabric to fill in for the squares.

6.10.2015B

I sewed each horizontal row into a long strip and then sewed the strips to each other.  I tried my best to match up the corners.  (When my mom started this project 28 years ago, she used scissors and not a rotary cutter to cut each blue square, so they weren’t all exactly the same size.)

6.10.2015C

You can see where I used a different yellow fabric for the squares, but I think it turned out looking nicer that way.

I finished sewing together the strips and– Ta-da!  Completed quilt top.

6.10.2015D