
Thank you for reading and for all your support! See you in 2016!
Tag Archives: quilting

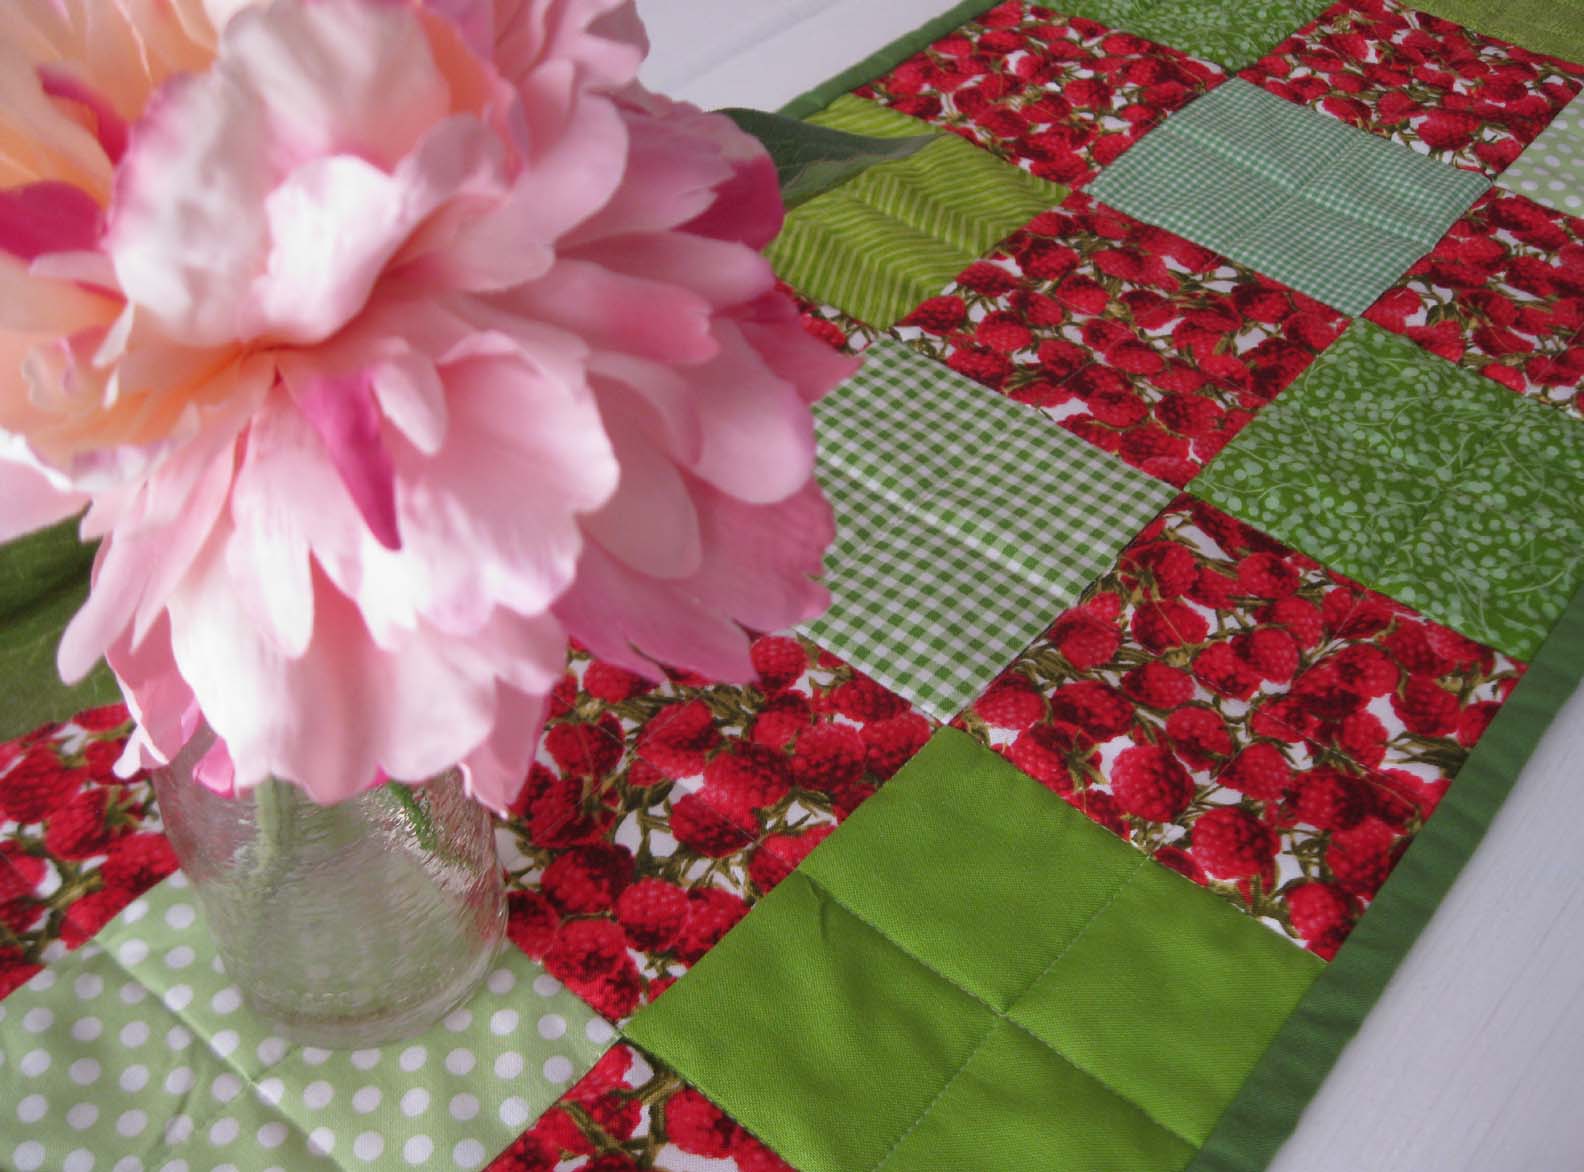


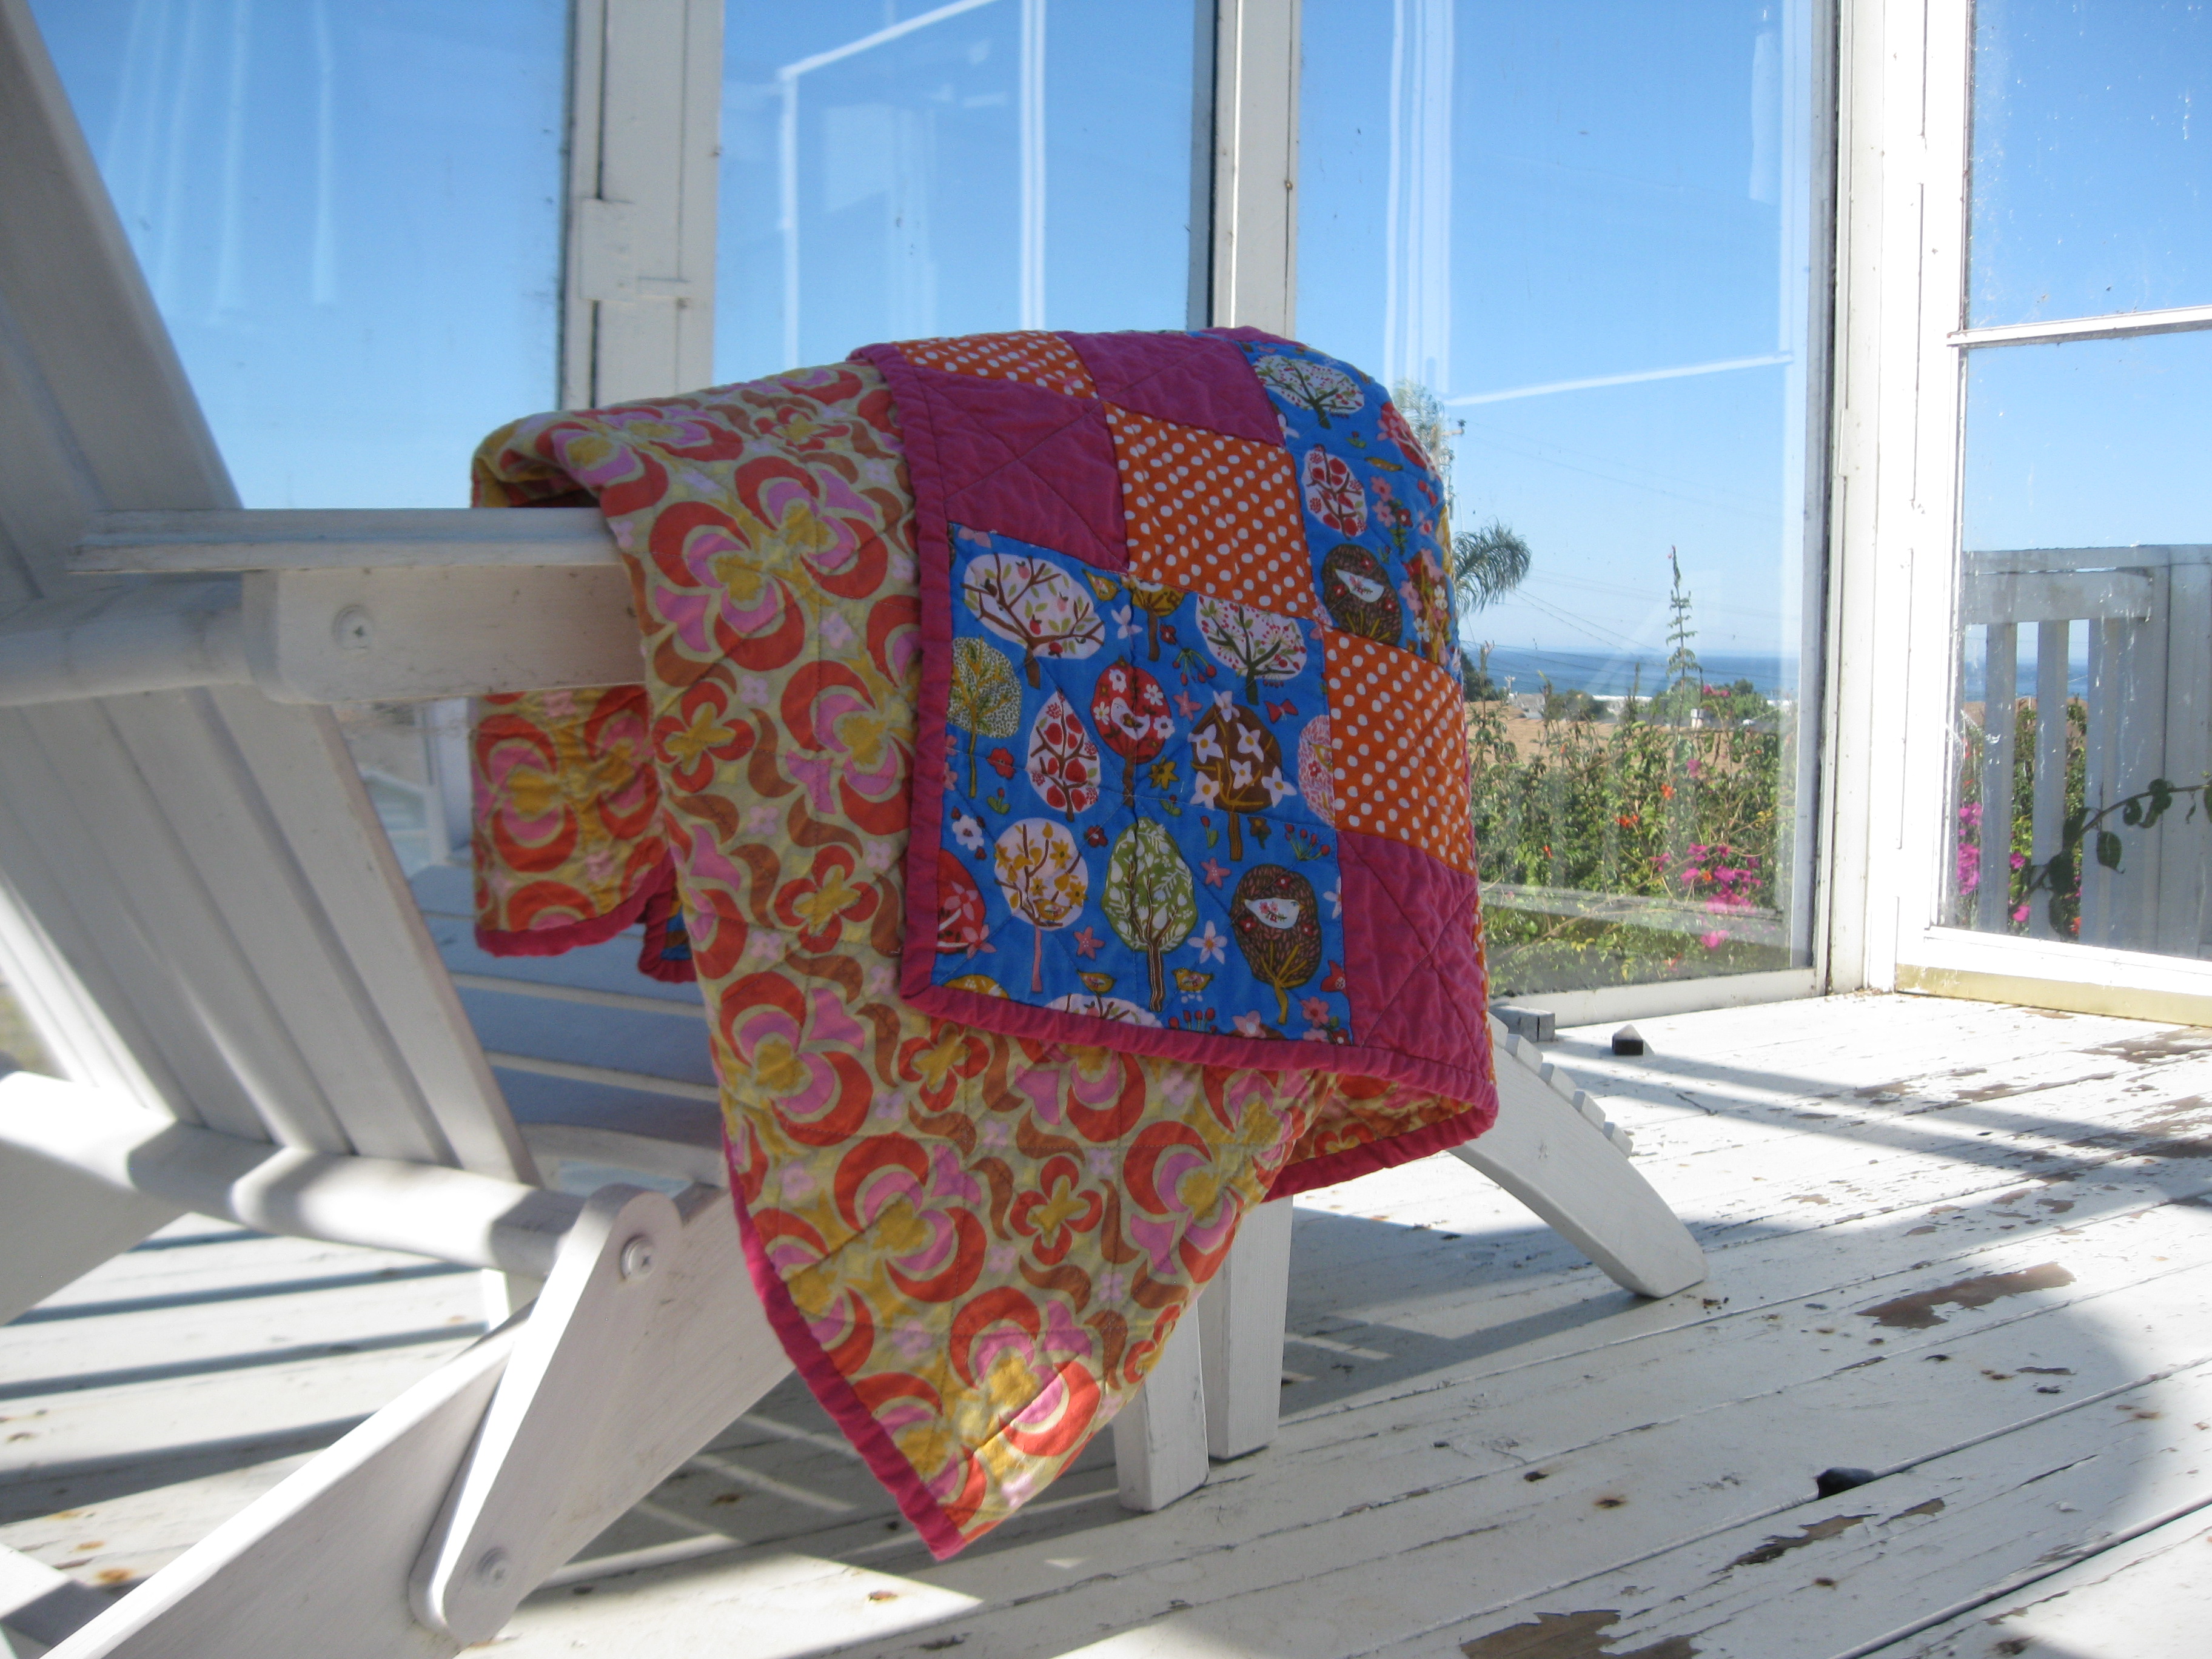


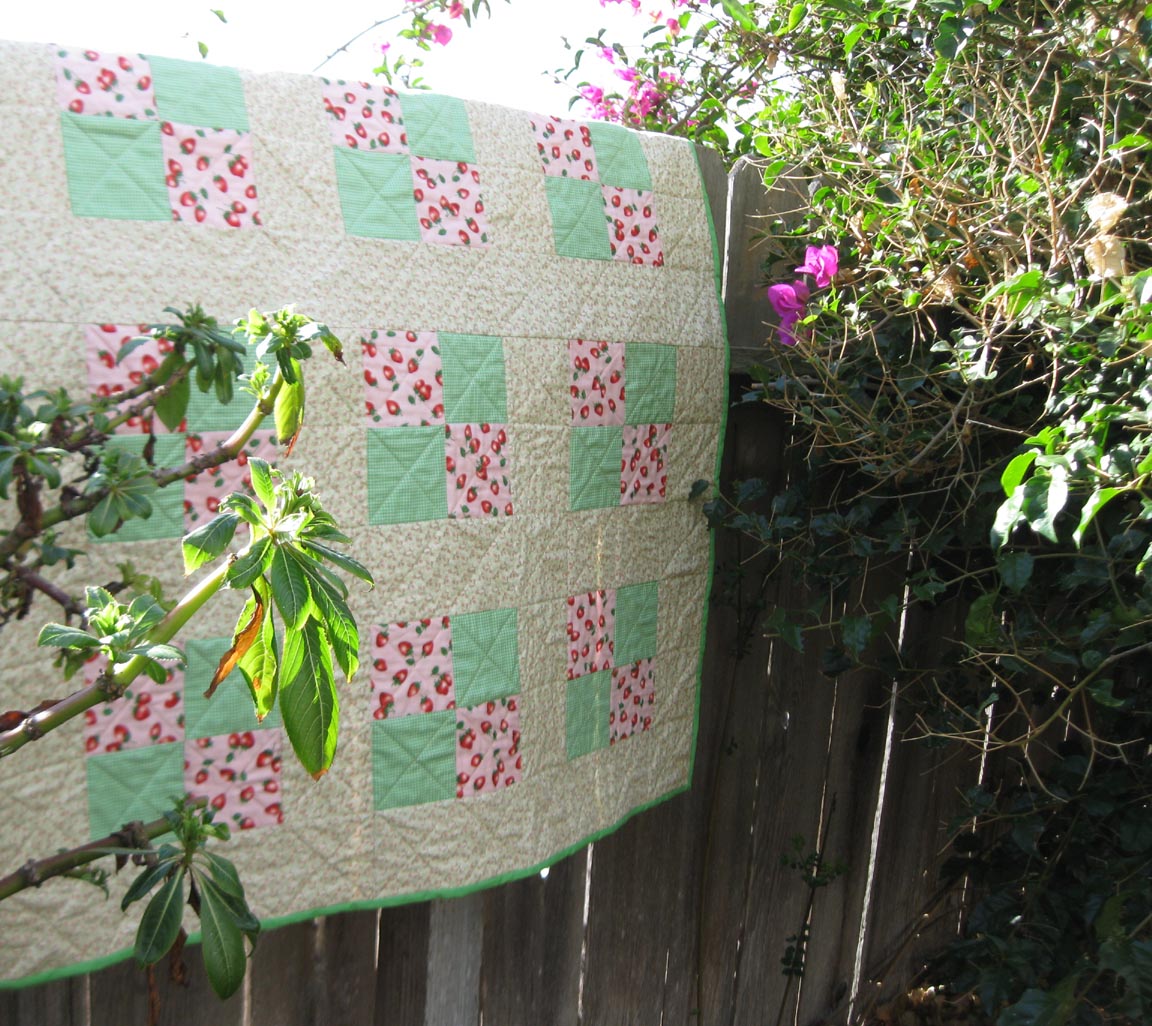


Day 334/365: The Shabby Chic Quilt, aka My Favorite Quilt
This morning, Facebook reminded me that I shared this photo on my timeline a year ago today.
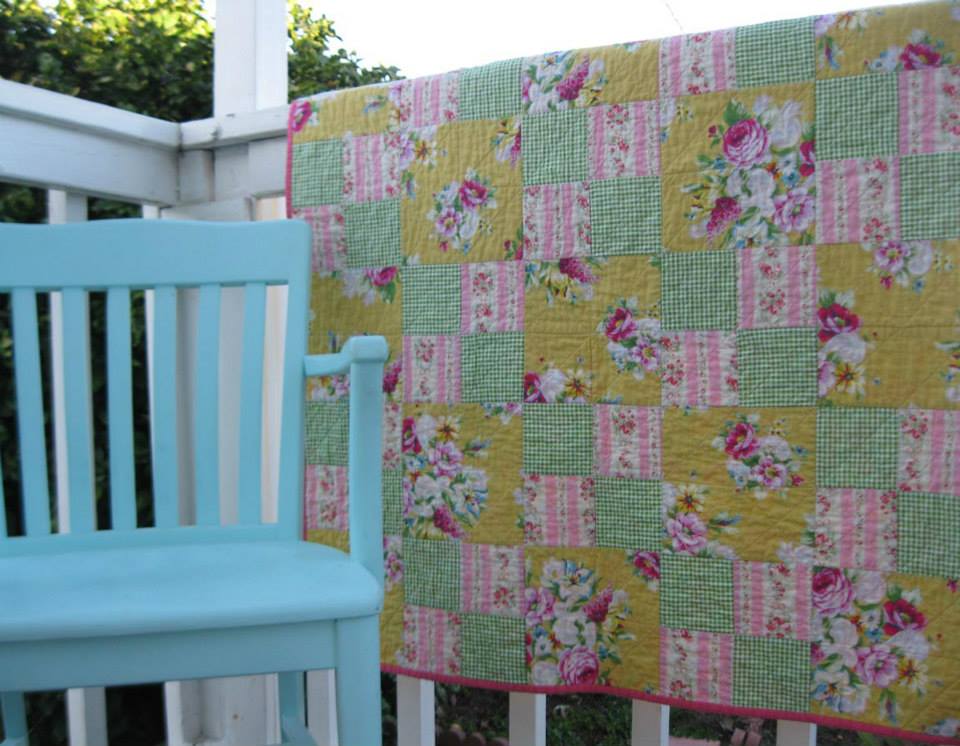
This is the third quilt that I made after I took a beginner’s quilting class last year. I’d pulled the pink striped fabric and the green gingham print from my fabric stash, but it took me a few weeks of searching various fabric shops until I came across that perfect accompanying print of flowers against a yellow background.
For the backing, I used a flannel print that I’d purchased around 2003-2004, when we’d just moved to Ventura.
I love the color combination of this quilt, and the flannel backing is so soft and comfy. I use it all the time when I’m lounging on the couch. The only problem is that it’s not very large, so my feet stick out from underneath if I pull it up to my chin. I think about making another quilt with a flannel backing, but I’ve got so many other projects I’d like to complete. So many projects, so little time! I am glad to see among my fellow bloggers that this is a perfectly common feeling.
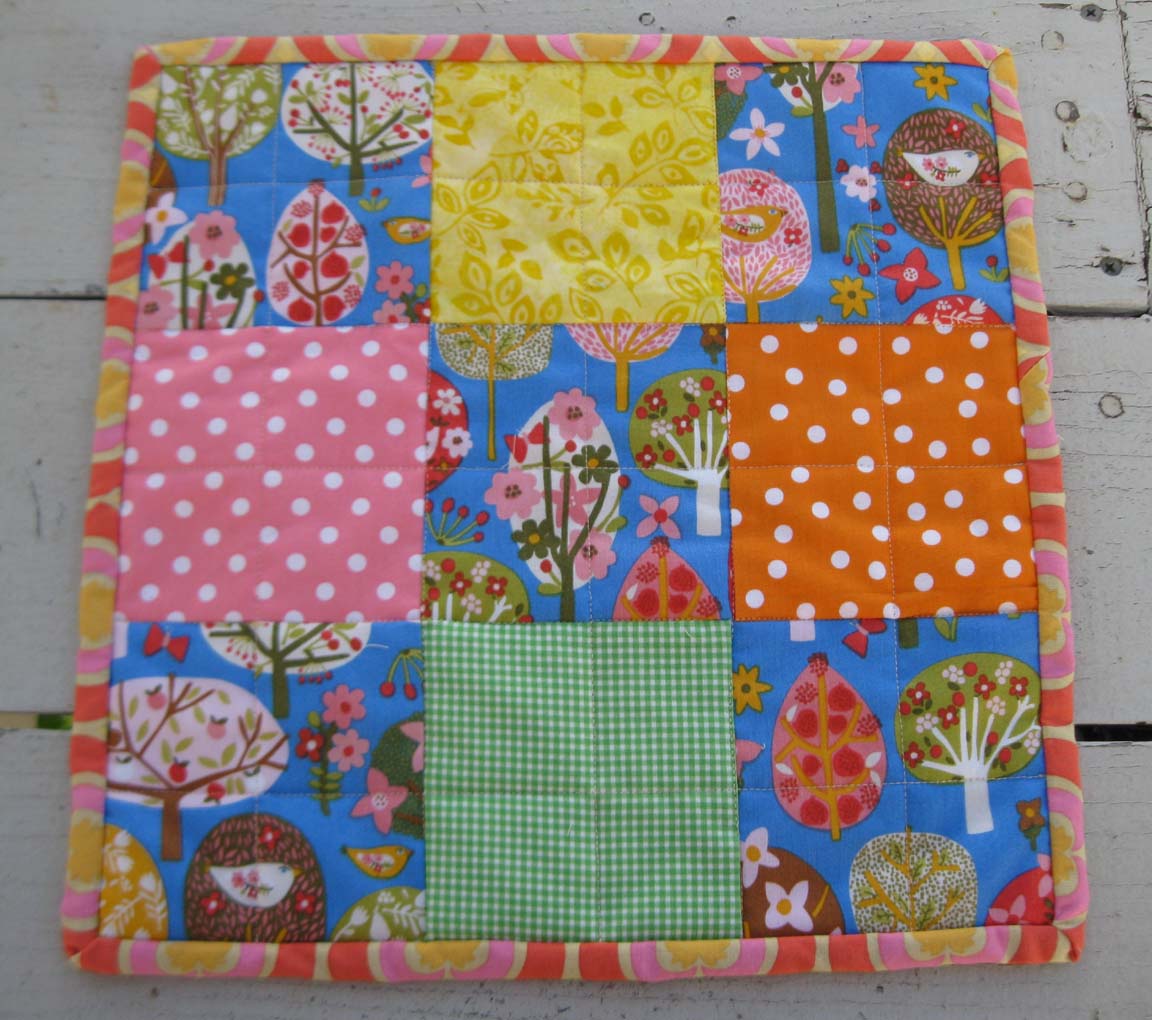
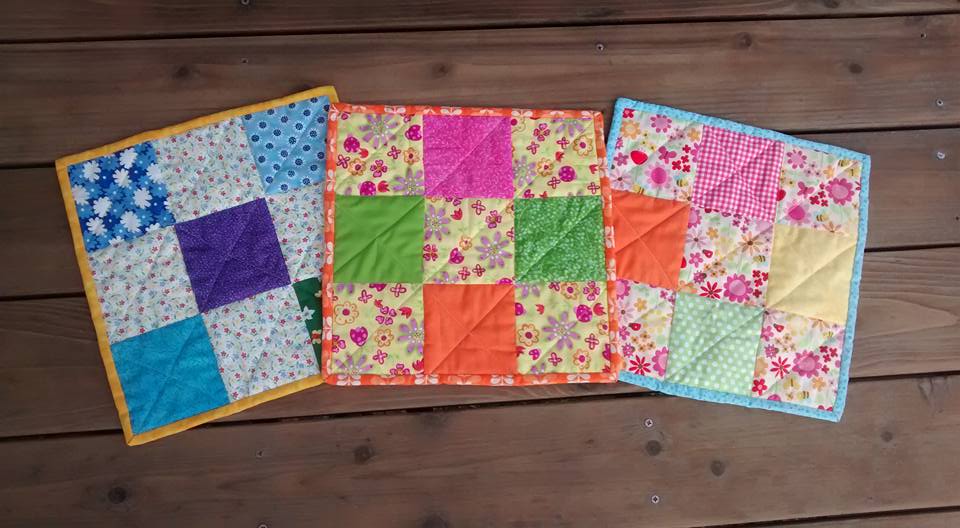
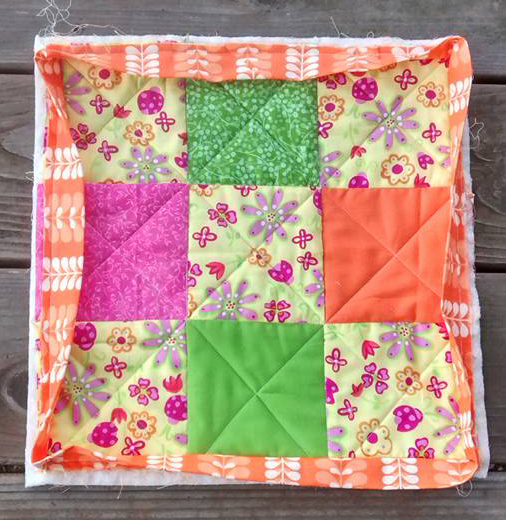
Day 208/365: Quilted Patchwork Placemat #1, Completed
Remember the nine-patch blocks that I sewed last weekend, and the quilted placemat that was just waiting for me to hand-sew the binding in place?
So I finally got around to doing that.
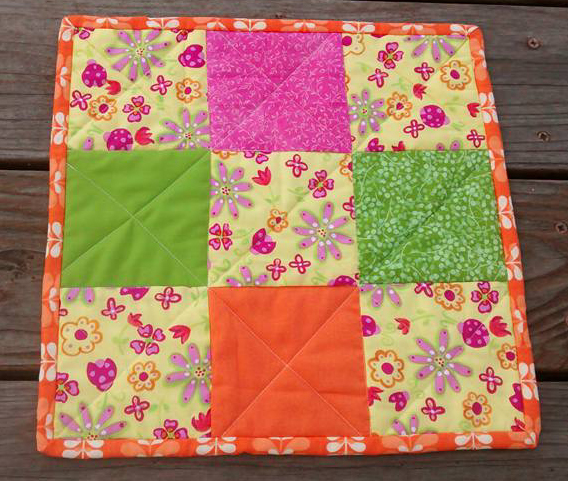
Hooray! It’s done!
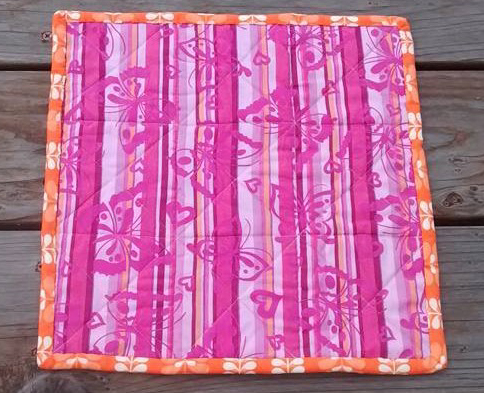
And it’s reversible!
I also spent some time today going through the fabric stash and slicing, pressing, and sewing together binding strips for the other two placemats that I am making for my cousin. I plan to work on them a little at a time this week, so they should be done in a few days.
Day 203/365: Quilted Placemat #1, Bordered
I got all the way to sewing the binding (or border, as Sean calls it) around the quilted placemat. Now all I need to do is sew it down by hand using the ladder stitch.
Yeah, that’s probably not going to happen any time soon.
Day 202/365: Quilted Placemat #1
Lately I’ve been on a sewing kick. I’ve set aside the knitting for now and am working on making a few quilted placemats out of the nine-patch squares that I sewed over the weekend.

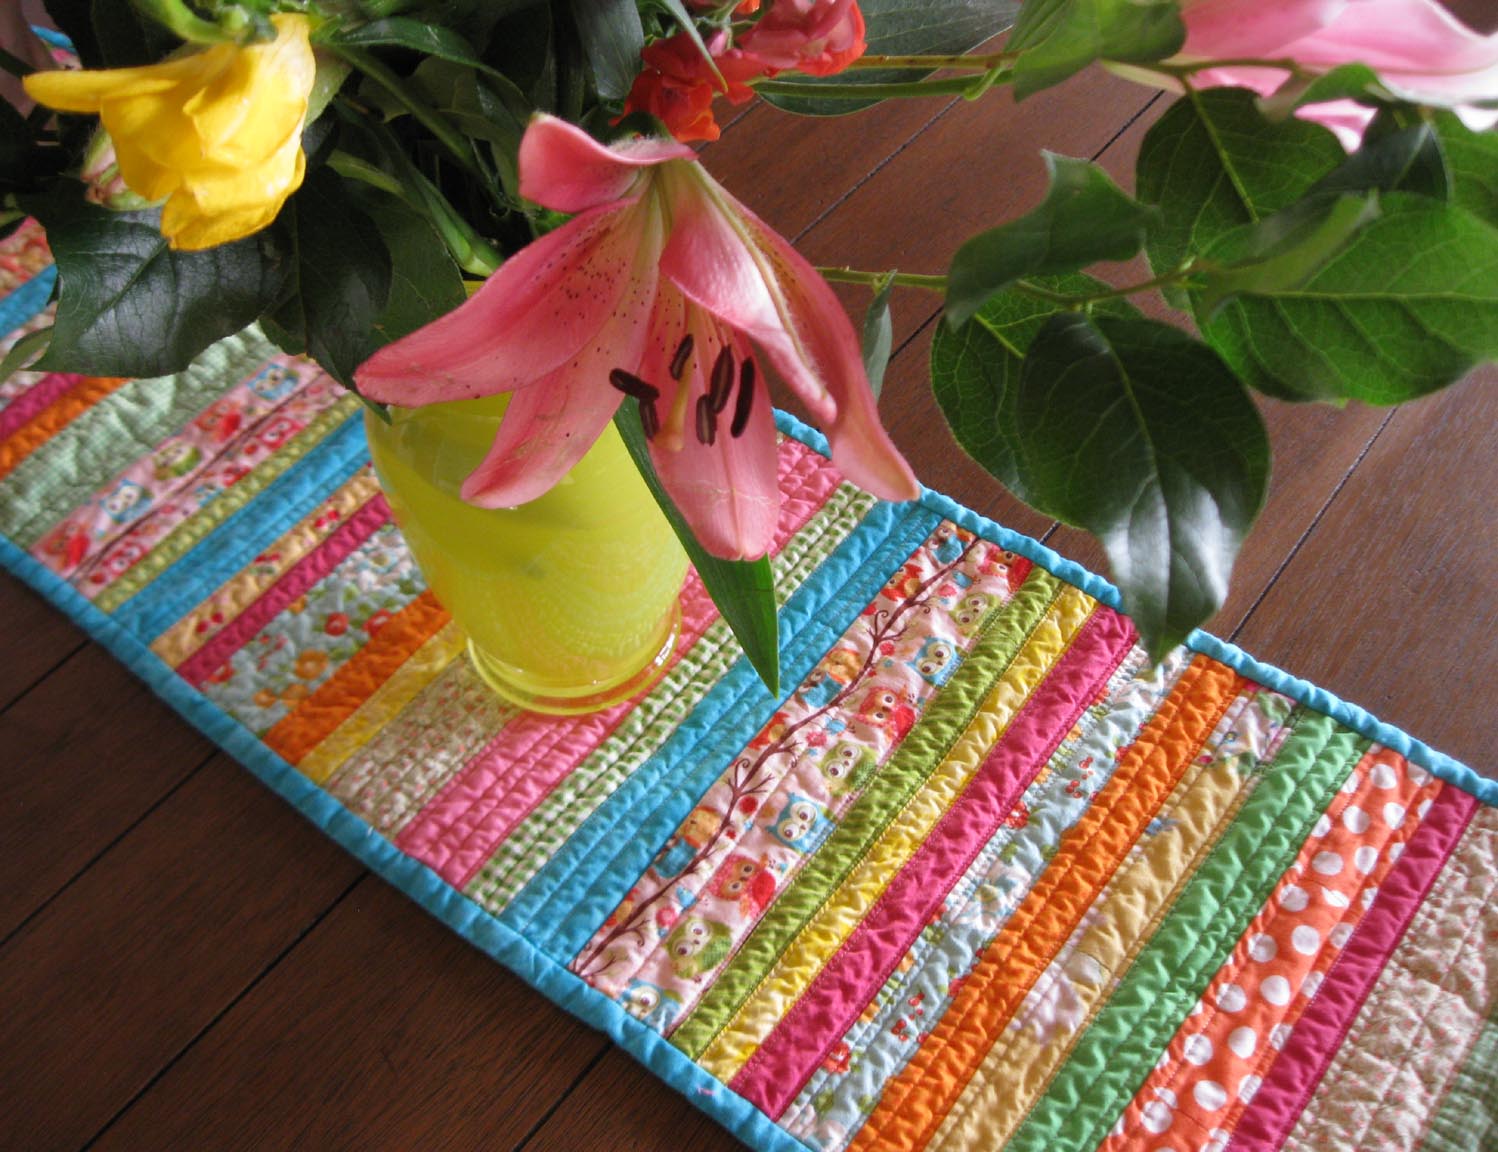
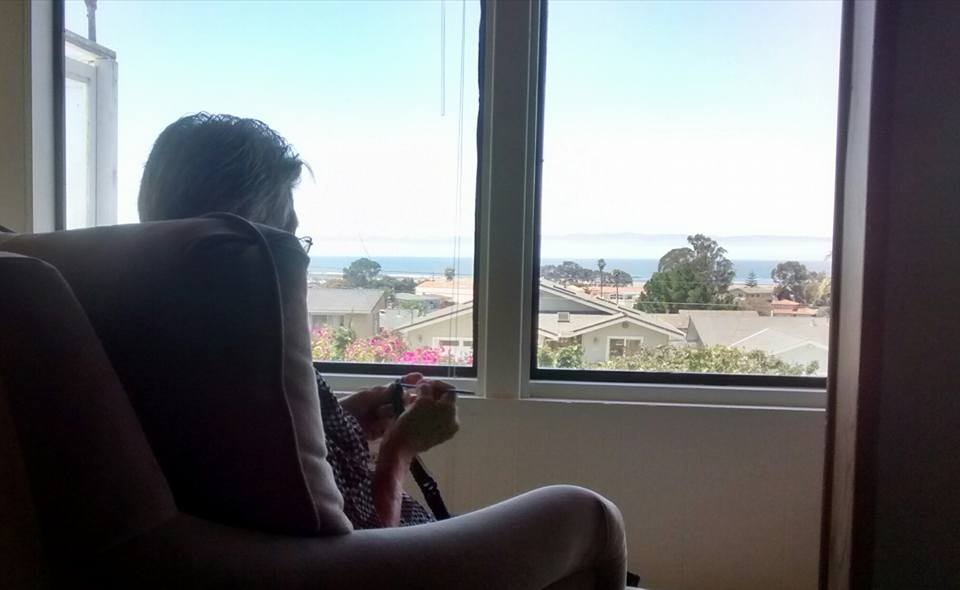
Day 186/365: The Day of the 2015 Women’s World Cup
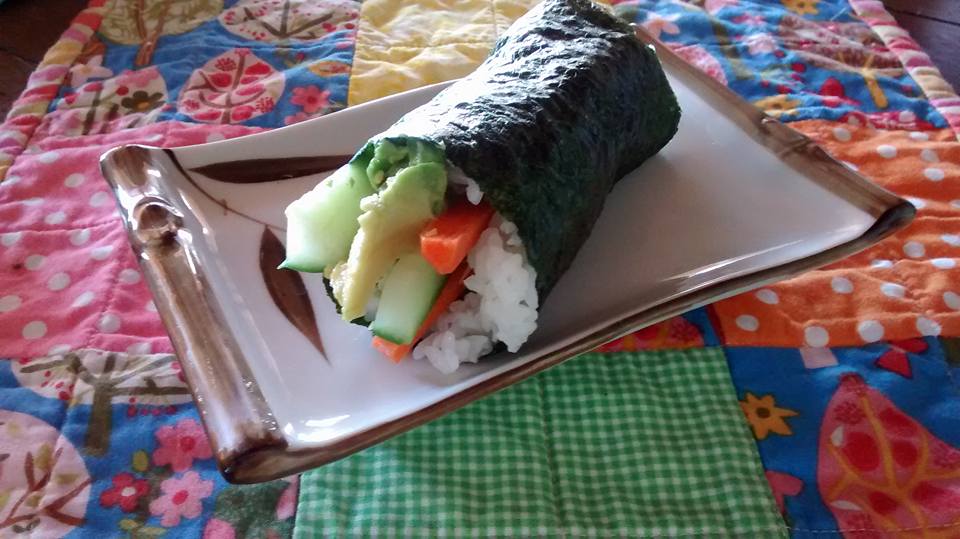
Sean is a huge soccer fan and right now we are waiting for the 2015 Women’s World Cup game between the USA and Japan to start.

Earlier for lunch, I made sushi rice and we ate fresh vegetarian hand rolls.

Both Sean and I love sushi and Japanese food, but today Sean is a USA fan, through and through.

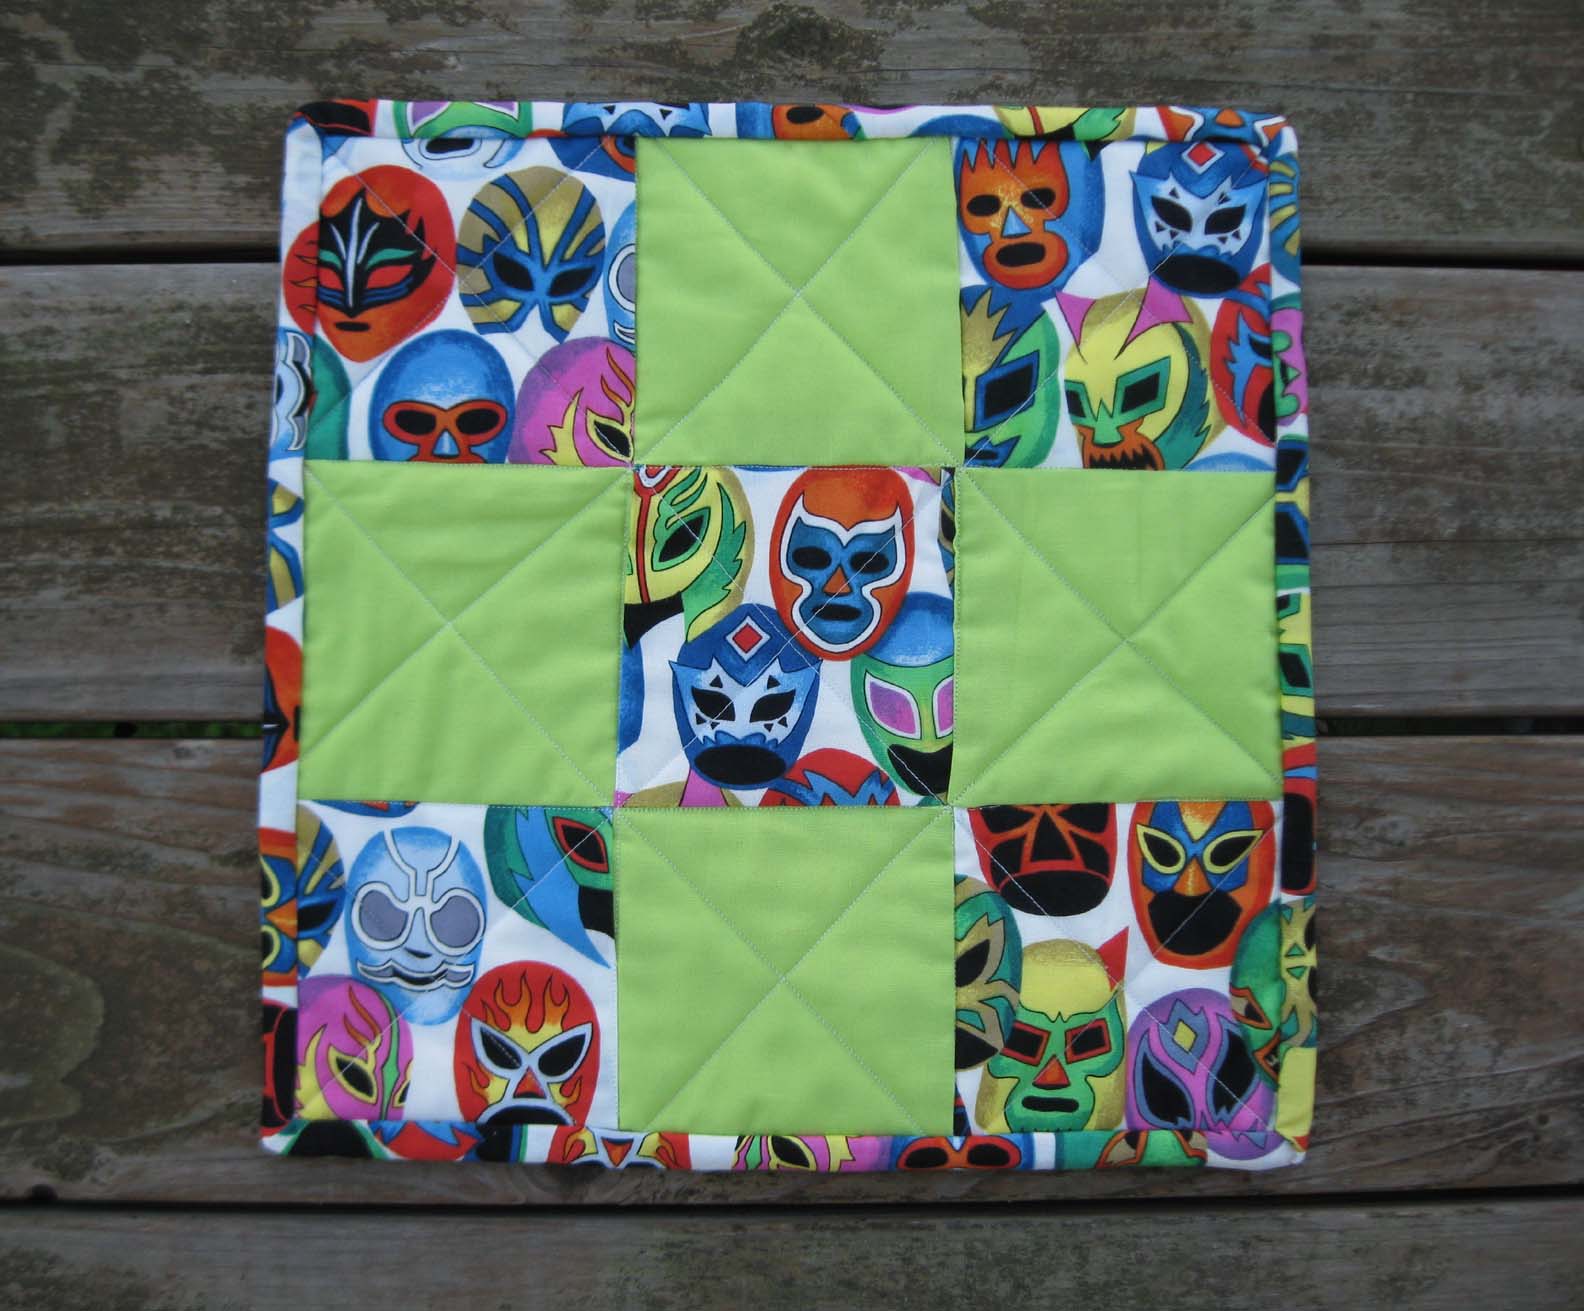
P.S. The table runner is the reverse side of this table runner from this post, and the quilted placemat is this one.
Day 165/365: The 28-Year-Old Block Project, Quilted and Completed!
Remember last week, when my mom was visiting from Hawaii, and I started piecing together the appliqued blocks that she began hand-sewing back in 1987?
Twenty-eight years later, it’s finished!

If you missed the earlier posts about this quilt, here’s what we started with:

My mom began this project back in 1987. She cut those blue squares with scissors instead of a rotary blade. (I don’t even know if rotary blades and self-healing cutting mats were available back in 1987.) Then, sewing by hand, she appliqued those little sun-hat-wearing figures to the blue background, using embroidery thread and the blanket stitch. Her original plan was to hand-sew each of the blocks together to make one large sheet to cover a bed.
I’m not sure exactly when she stopped working on this project, but she didn’t get around to seriously picking it up again until just last year. About three months ago, she sent a photo of the blocks to me with a text message: “Look at what I’m working on.” She had completed a huge pile of them.
I texted back and offered to sew the blocks together on my sewing machine. She was planning on coming out to California in June for my nephew’s high school graduation, so I figured I’d do it while she was in town for her visit. Fast forward to last week, when she arrived in Morro Bay with her luggage and goods from Hawaii.

When I saw the actual blocks, I realized that they’d look a lot better against a contrasting fabric, rather than sewn side by side. So I purchased some yellow cotton and went to work.
Here is a recap of the steps:

Cutting fabric with rulers, a rotary blade, and a self-healing mat. No using scissors here!

This cute little guy needs a yellow frame to really stand out.
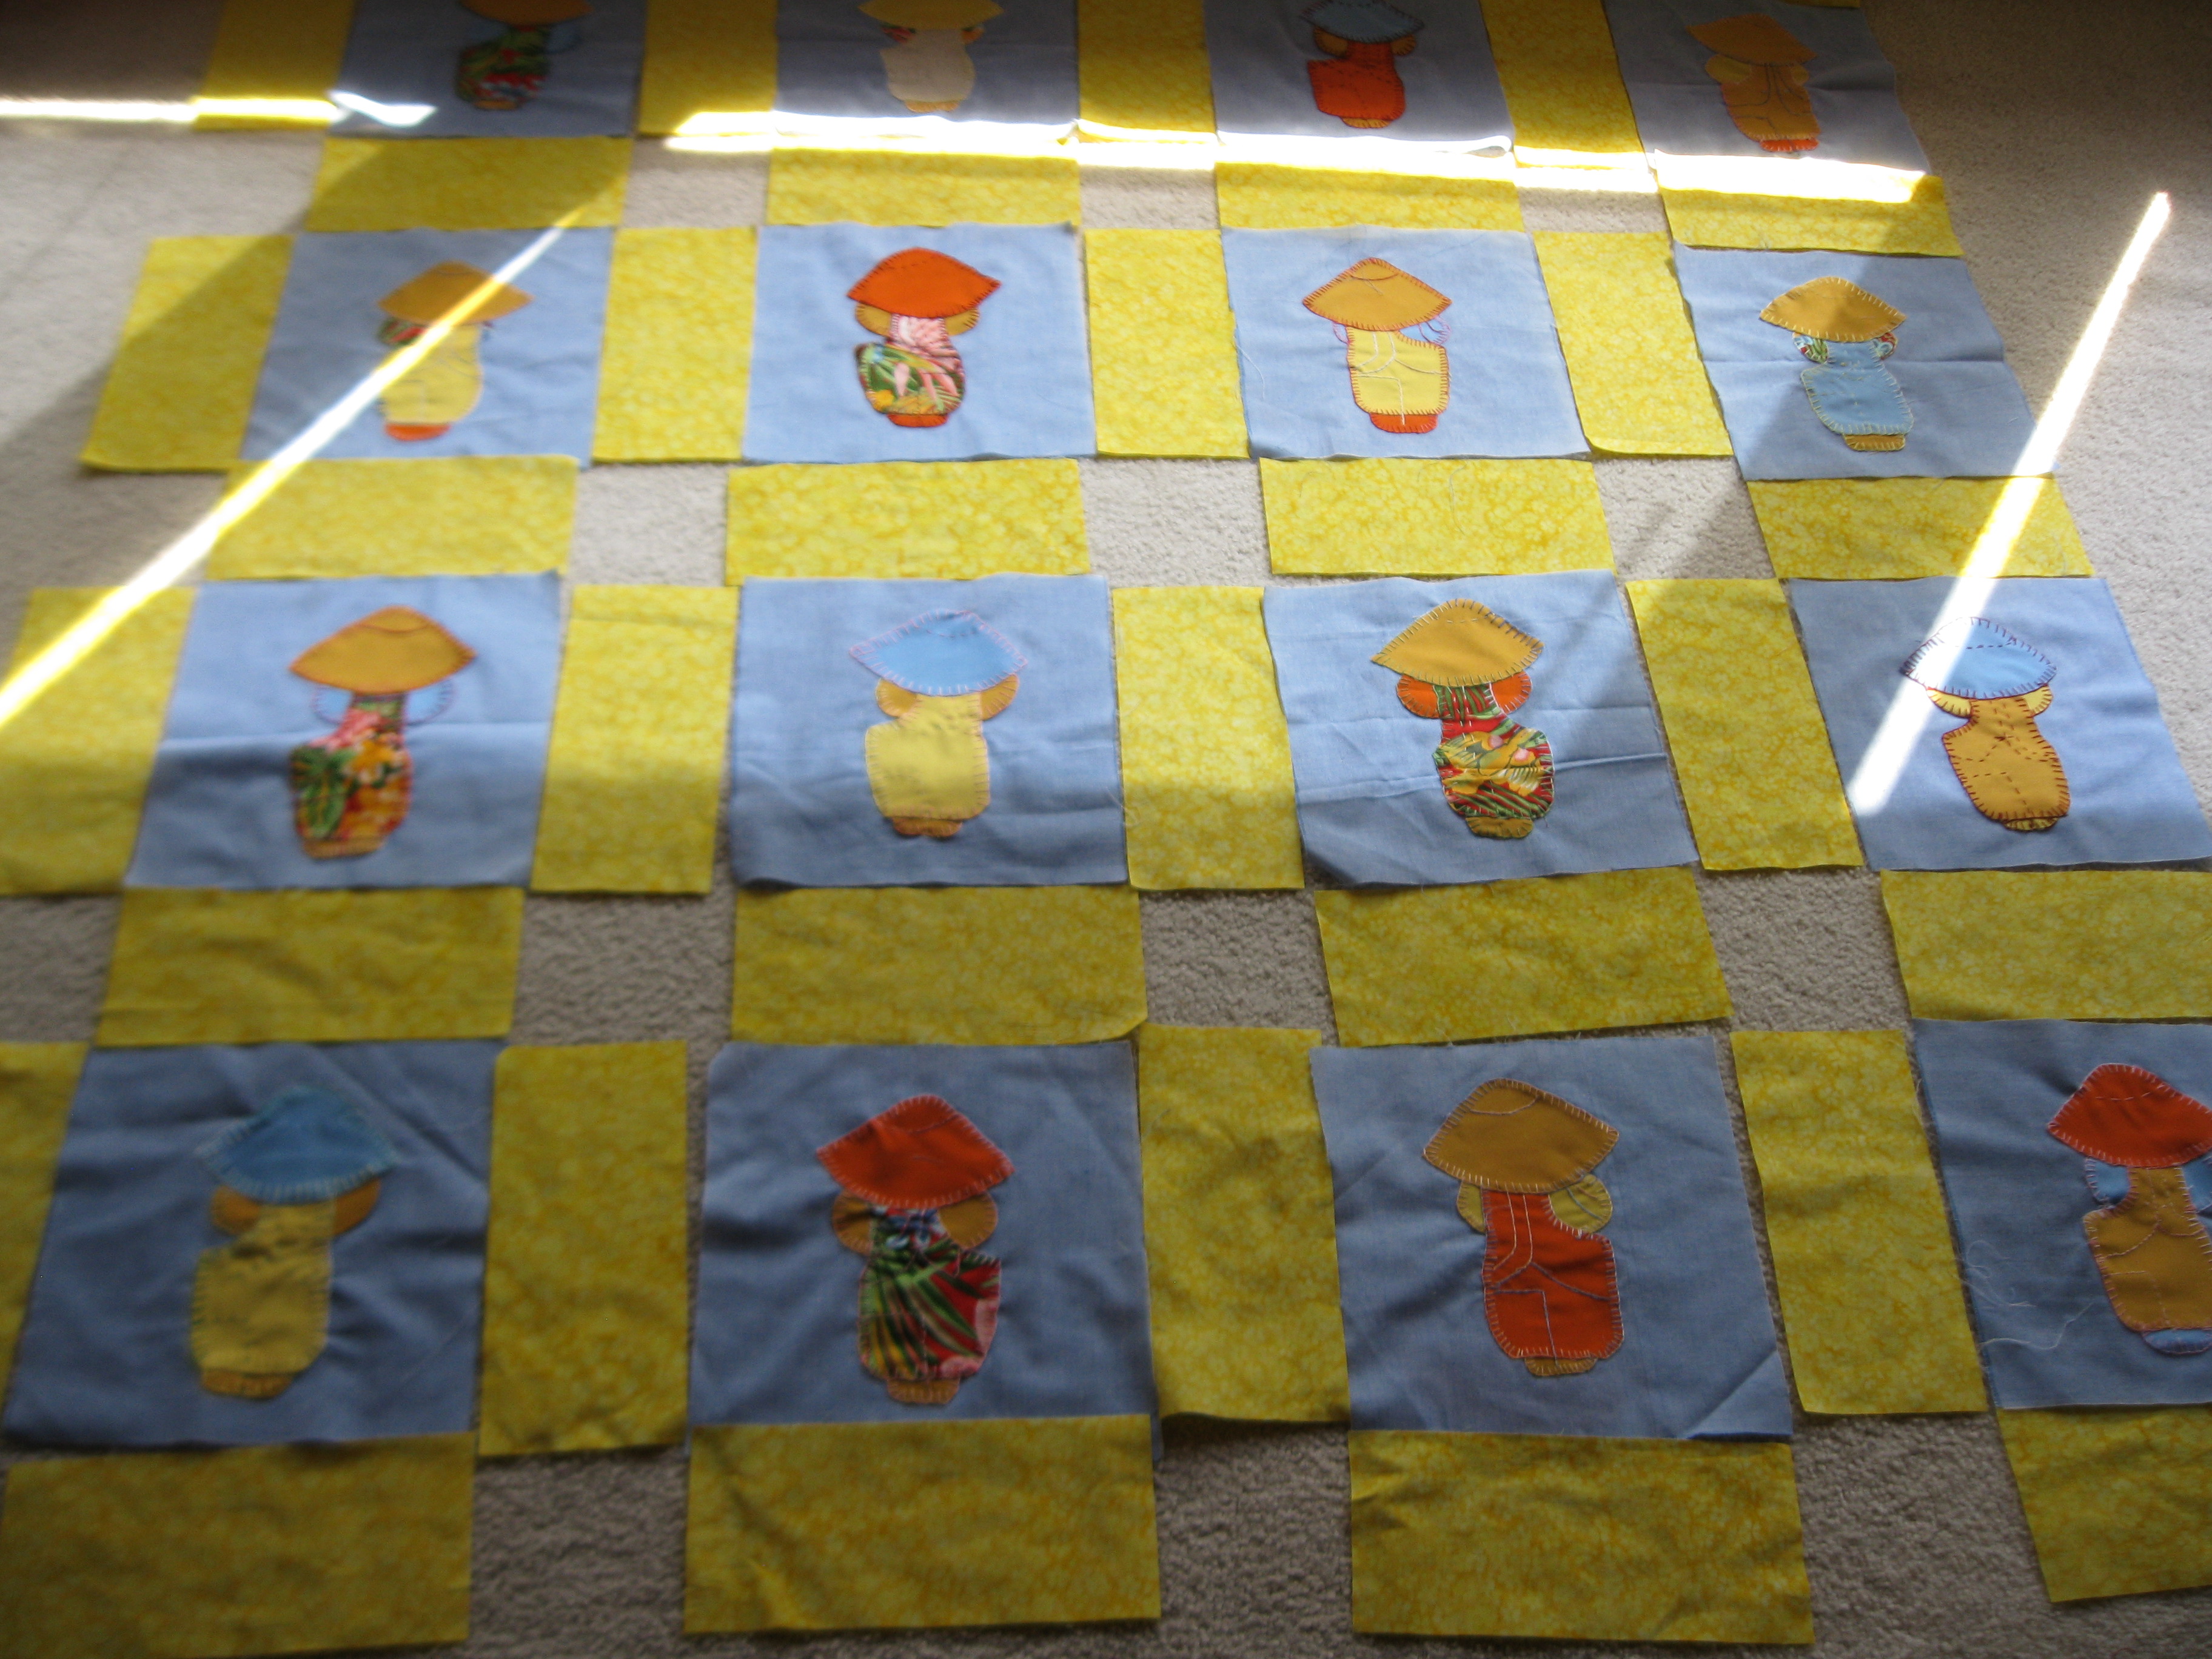
Each one getting his own frame.

Filling in the squares.

Sewing strips, and then sewing the strips together.

The finished quilt top!
I didn’t take any photos of layering the backing/batting/quilt-top sandwich or any photos of the actual quilting, but here’s what it looked like toward the end:
So close to being done!
And there you have it…
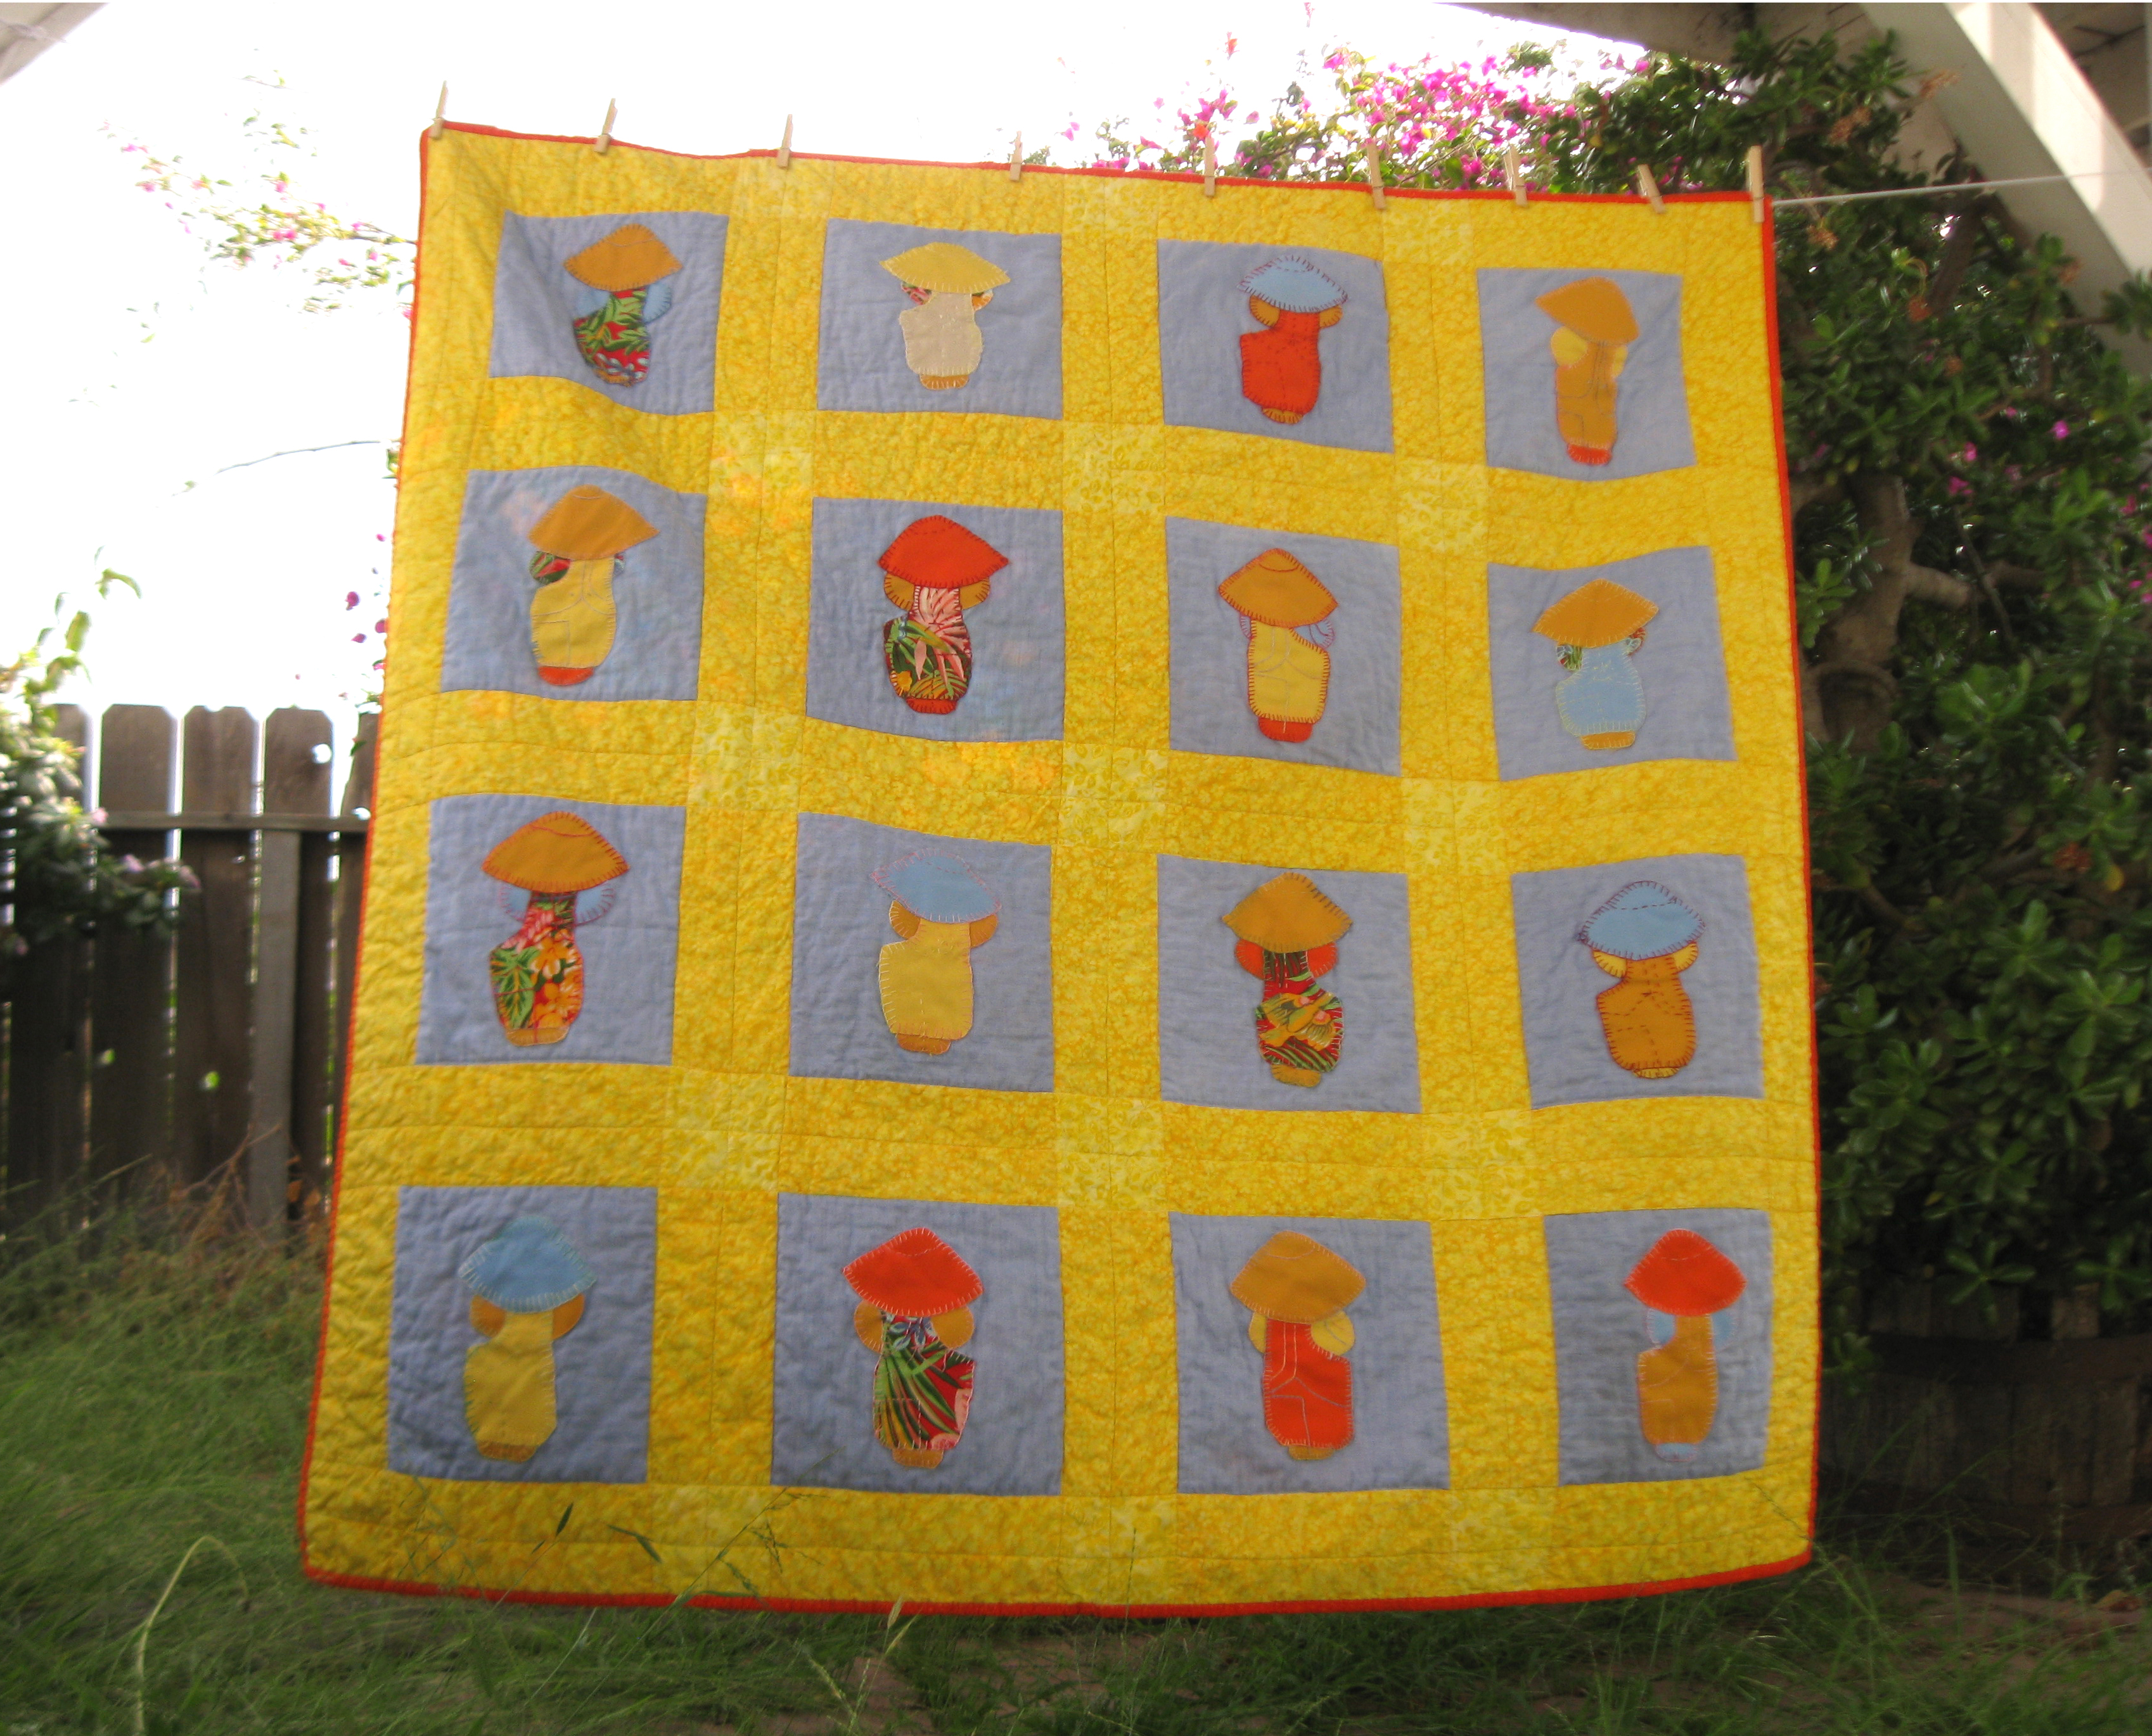
Ta-da! The finished quilt in all its glory.
A labor of love for my Mama.

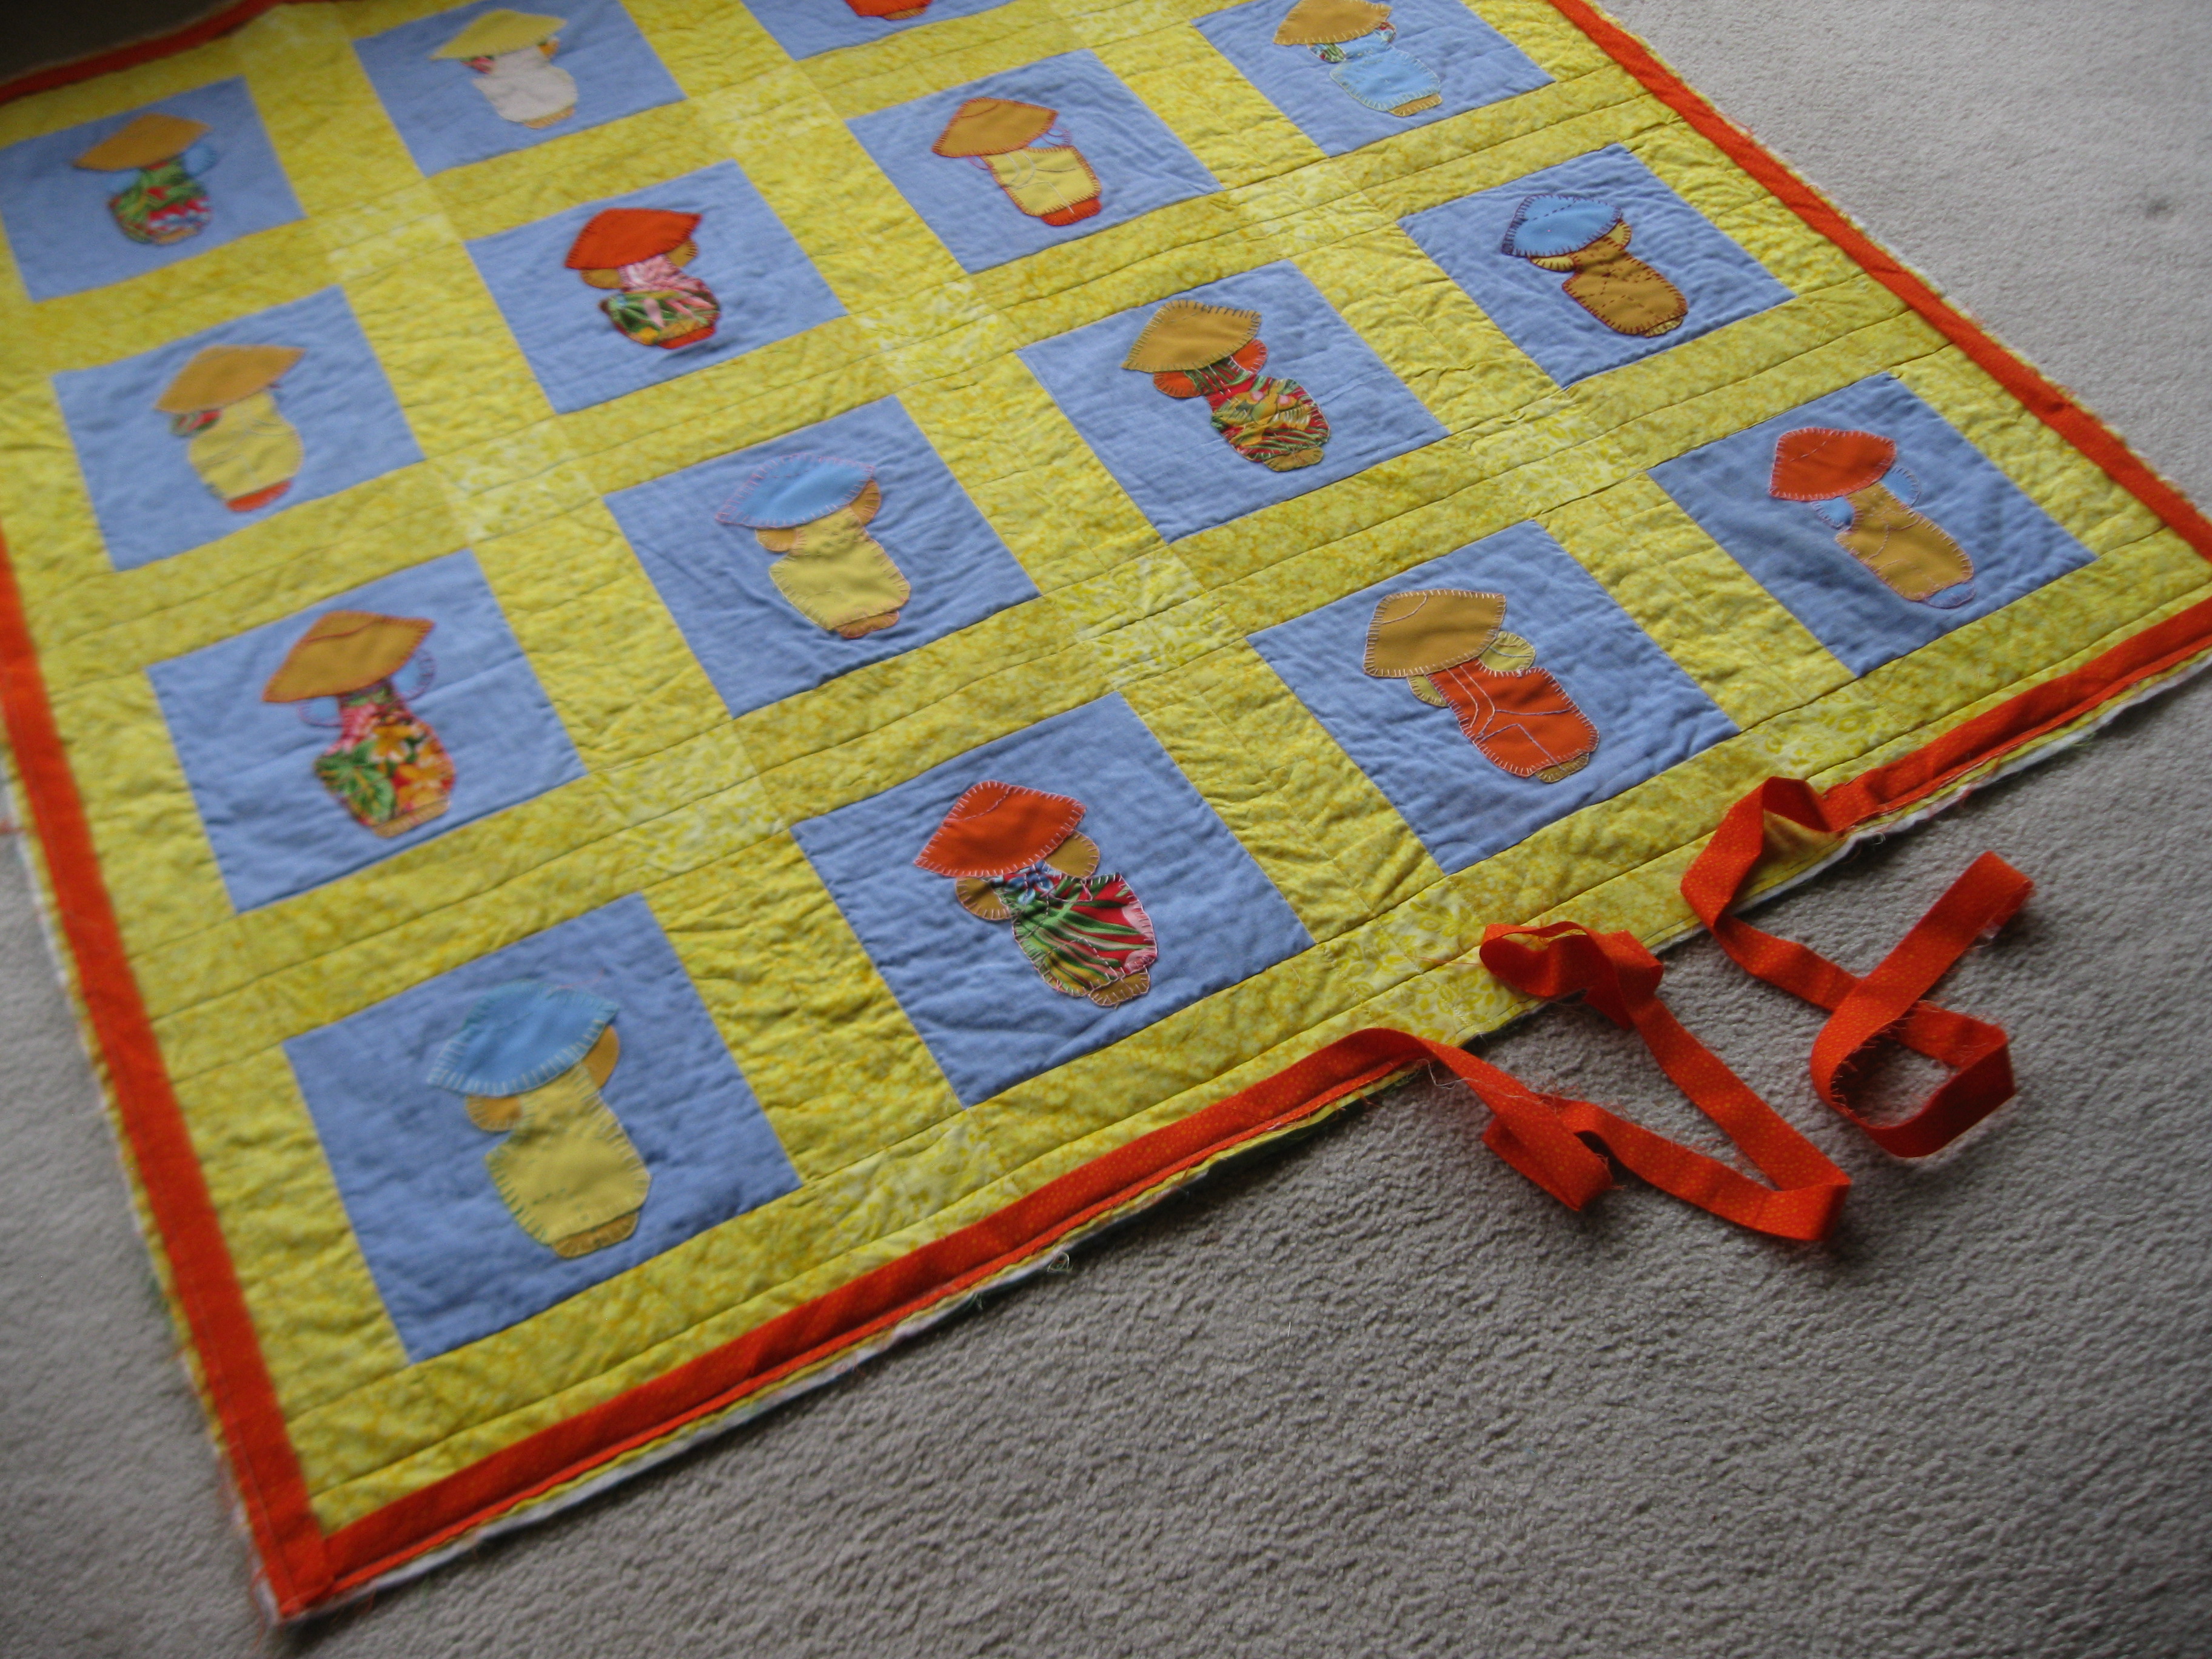
Day 164/365: All Bound Up!
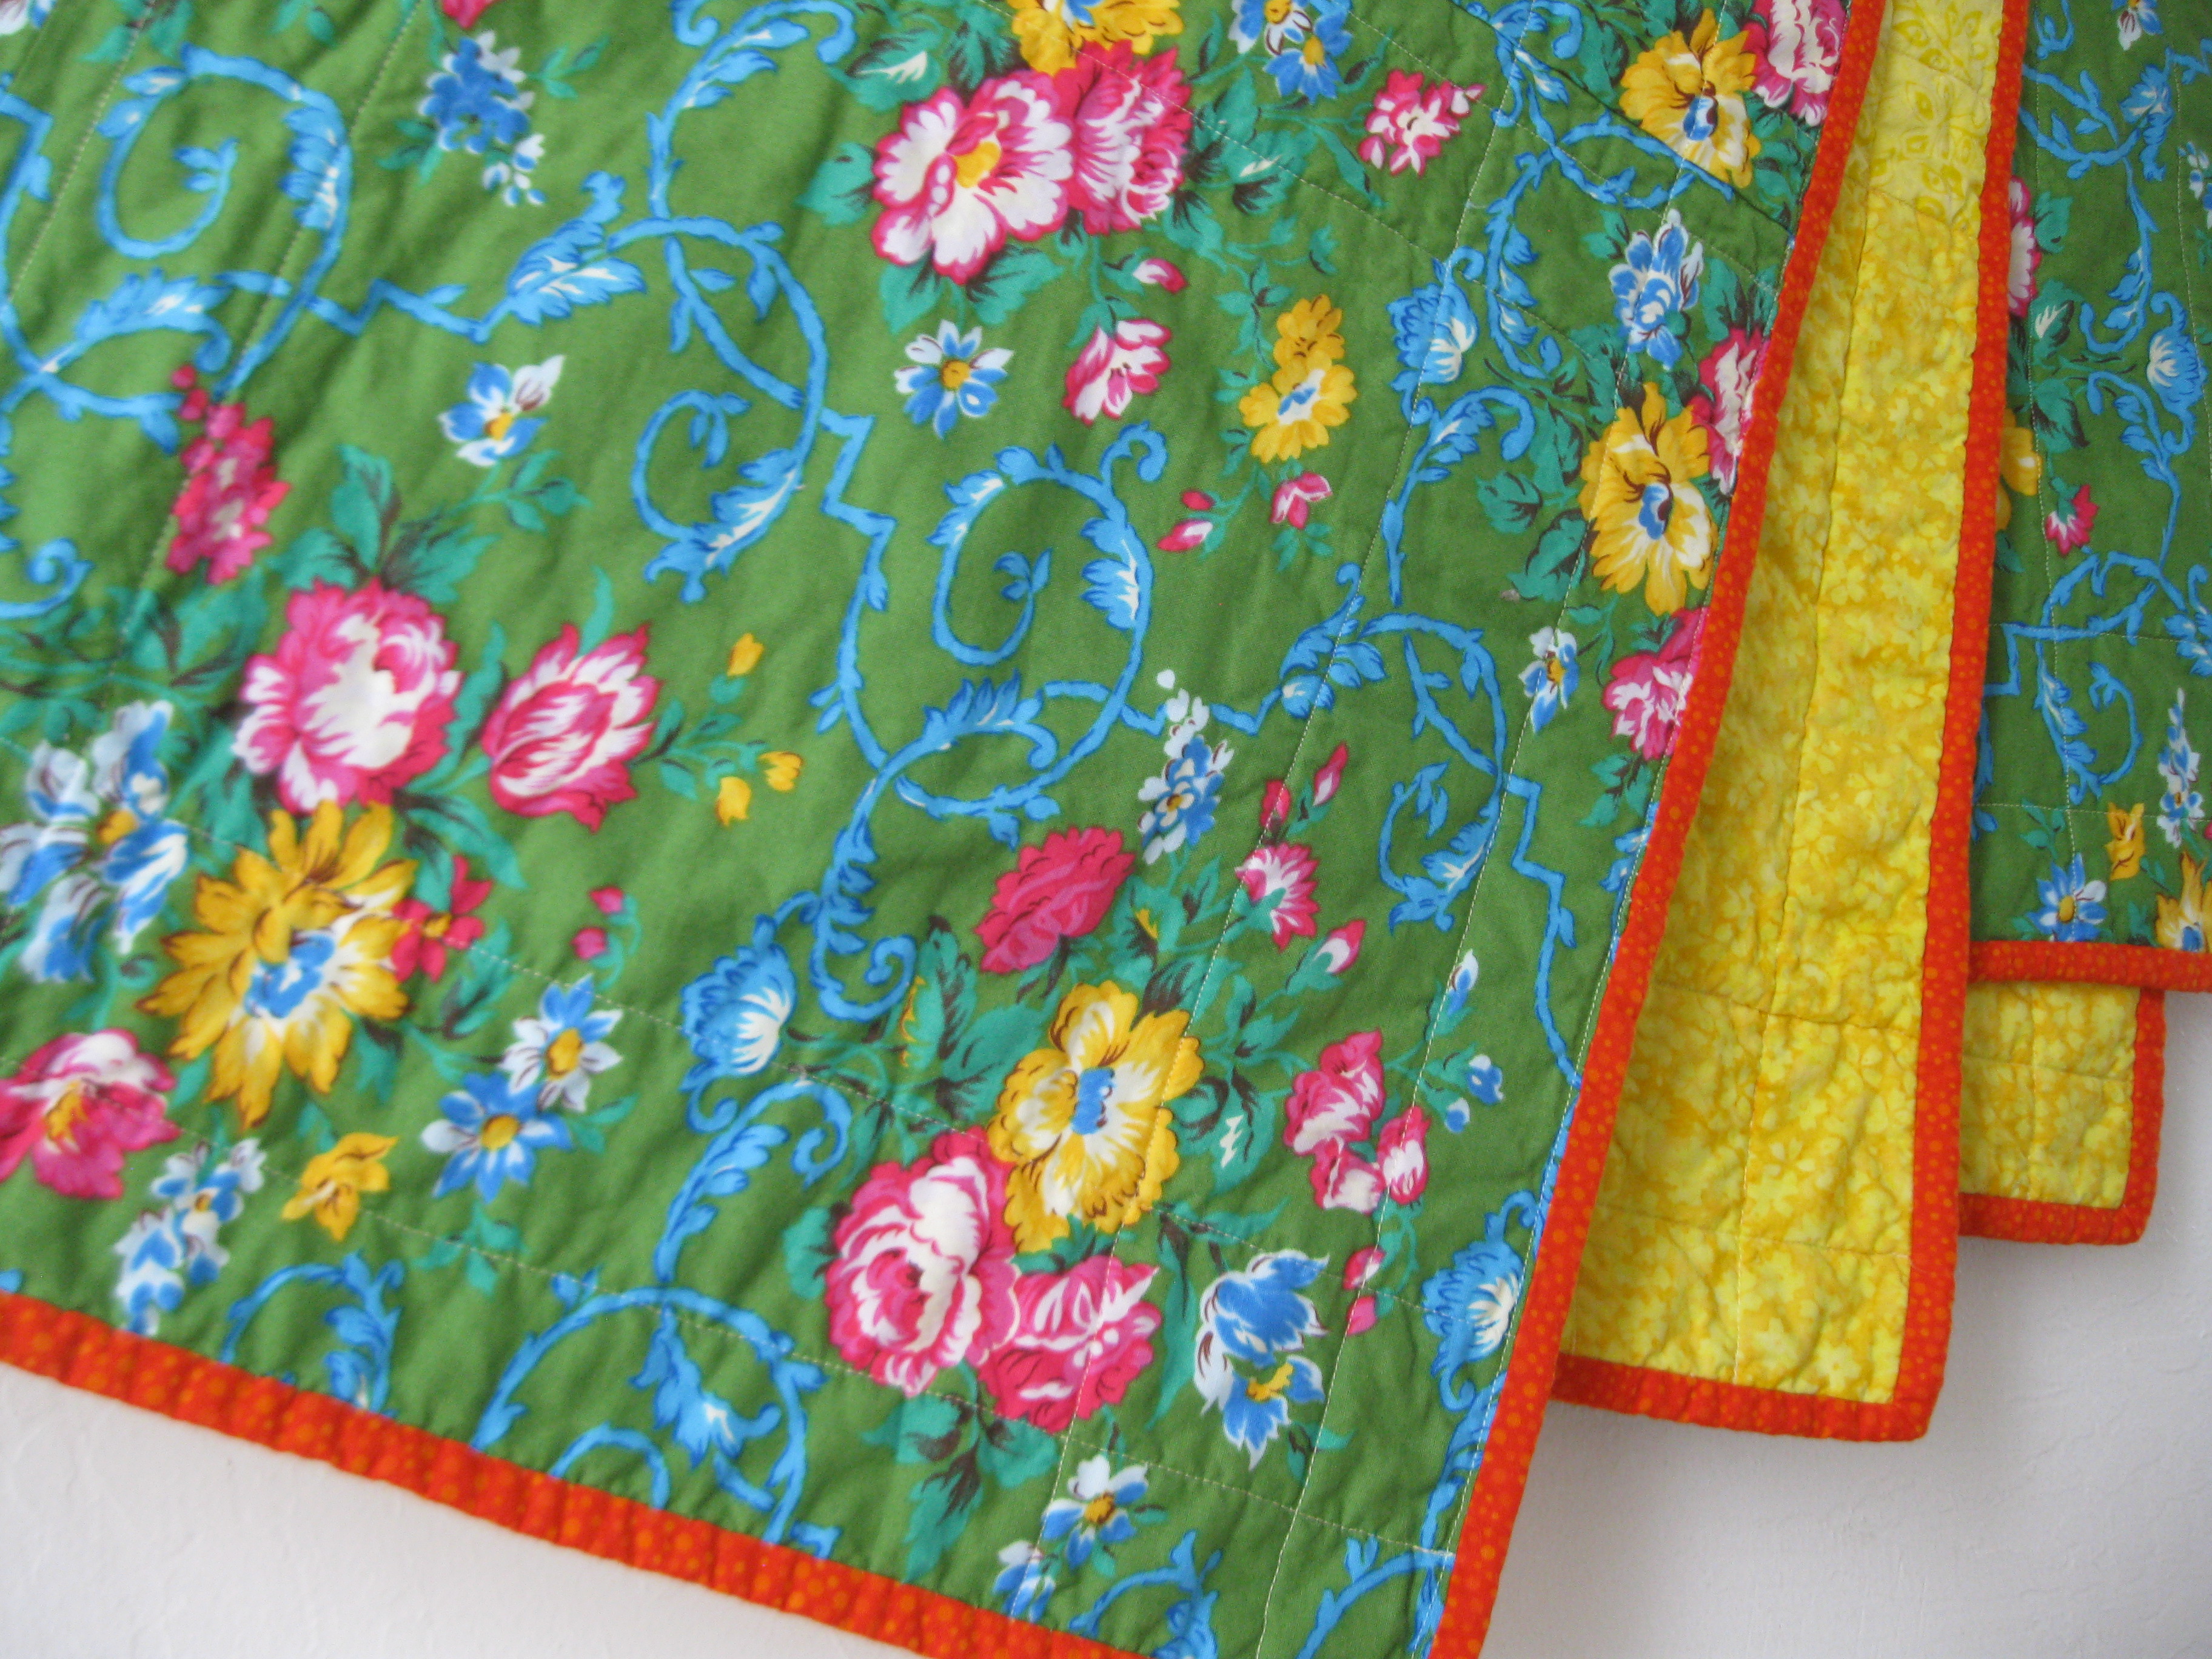
It took a few hours, but I finished hand-sewing the binding to the quilt.

I thought you would enjoy seeing what the back of the quilt looks like.
Stay tuned– I’ll post more photos of the full quilt tomorrow!
Day 163/365: Almost Done…
Remember this photo from yesterday?
I sewed together those two ends. The last thing I need to do now is hand-sew the binding to the back of the quilt, using the ladder stitch. It will take me a couple of hours, I think, and then this project will be done!
Day 162/365: Quilting The 28-Year-Old Blocks
To refresh your memory: the finished quilt top.
For the backing of my current quilt project, all I had to do was go to the fabric stash. I found three yards of a green cotton with a pretty repeating floral motif. I had to do some measuring, cutting, and sewing to make the backing wide enough for the quilt top. Then I taped the completed sheet of fabric backing to the carpet and proceeded with spraying quilt basting spray and sandwiching the layers of quilt backing, the batting, and the quilt top.
For the binding, I purchased half a yard of an orange cotton print from my local independent fabric shop. After slicing the orange fabric into strips, I went through the process of folding, pressing, and sewing them together to make one long strip of binding.
Next I machine-quilted the fabric and batting sandwich. I didn’t do anything fancy– just sewed straight lines. The last thing I did before calling it a day was sew the binding to all four edges, leaving a gap where the two ends will have to be connected.
Ahhh… almost done.
